Retro terminal
Project repository: https://gitlab.com/qnx/projects/simple-terminal.git
Simple Terminal is a QNX port of a simple terminal written for use with X11 desktops.
The purpose of this project is to give the simple terminal a retro look, by modifying the simple-terminal folder included in the qnxuser projects folder.
To help with cut and paste commands, select the Applications menu, then Internet > Web Resource > Self-Hosted Developer Desktop Guide to view this tutorial on your desktop.
Prerequisites
Before building this project, run the following command in the terminal to install the necessary dependencies:
sudo apk add ncurses-dev qnx-screen-devThen, follow these steps to set up the project:
Navigate to the project folder:
cd ~/projects/simple-terminalBuild the project:
makeInstall the executable and its related files:
sudo make install
Editing and building with Geany
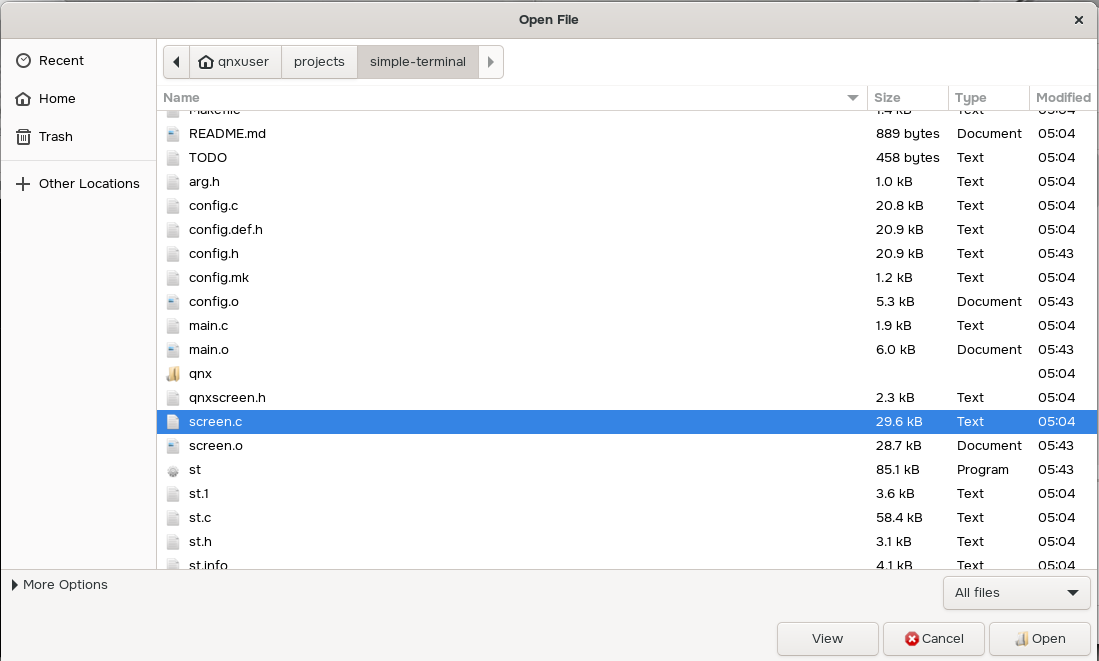
Open the File menu, select Open, then open screen.c:
Make the following updates to screen.c:
Find the color enumerations and add these entries to the end of the existing list:
MONO_P1_GREEN,
MONO_P3_AMBER,
MONO_P4_WHITE,
MONO_VT100_LIGHT_GRAY,
MONO_VT100_LIGHT_BLUE,
MONO_VT100_WHITE,
Find the
NUM_COLOURSmacro and change the value to26:#define NUM_COLOURS 26Find the init_colours() function and add the array entries corresponding to the new enumerations at the end of the function:
colours[ROLE(MONO_P1_GREEN)] = (colour_t){ 0.2, 1.0, 0.4 };
colours[ROLE(MONO_P3_AMBER)] = (colour_t){ 1.0, 1.0, 0.4 };
colours[ROLE(MONO_P4_WHITE)] = (colour_t){ 1.0, 1.0, 1.0 };
colours[ROLE(MONO_VT100_LIGHT_GRAY)] = (colour_t){ 0.866666667, 0.866666667, 0.866666667 };
colours[ROLE(MONO_VT100_LIGHT_BLUE)] = (colour_t){ 0.6, 0.866666667, 1.0 };
colours[ROLE(MONO_VT100_WHITE)] = (colour_t){ 1.0, 1.0, 1.0 };
Find the xdrawcursor() function and make this change:
//g.bg = CURSOR;
g.bg = MONO_P1_GREEN;
Open the config.c file the same way you opened screen.c in the previous step. Then, make the following updates:
Append the following lines to the colorname array:
"#33ff66", /* Green phosphor (P1) monochrome terminal */
"#ffff33", /* Amber phosphor (P3) monochrome terminal */
"#ffffff", /* White phosphor (P4) monochrome terminal */
"#dddddd", /* DEC VT100 light gray monochrome terminal */
"#99ddff", /* DEC VT100 light blue monochrome terminal */
"#ffffff", /* DEC VT100 white monochrome terminal */
Change the default foreground color a few lines below the above snippet:
//unsigned int defaultfg = 258;
unsigned int defaultfg = 260;
Save your changes.
Open the Build menu and select Make.
Open the Build menu again and select Make Custom Target. Type install in the field and click OK.
When prompted, enter your password to give the operation root permissions.
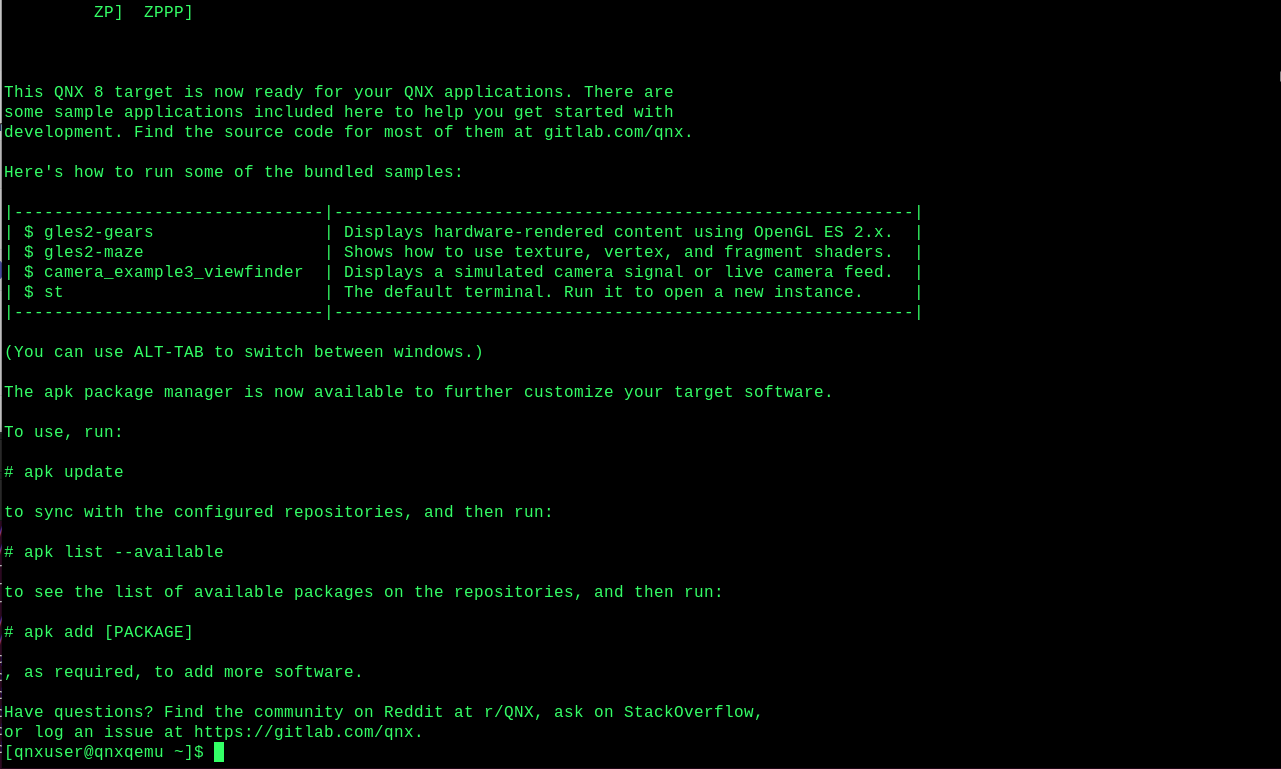
Shut down or log out of the desktop to return to the demolauncher. Then, click the terminal icon (
 ).
).A green, retro terminal is displayed: