Creating a project
QNX Toolkit1.1QNX Toolkit User's GuideDeveloperSetup
You can create several different types of projects. You can also open sample projects to get up and running quickly with QNX sample code.
The following project types are available:
| Project Type | Recommended usage |
|---|---|
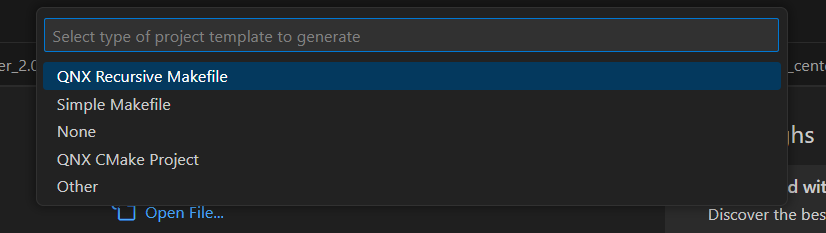
| QNX Recursive Makefile | To create an application or library project which uses the QNX recursive make build system. |
| Simple Makefile | To build a QNX OS application or utility using a traditional makefile. |
| None | To create an empty QNX project which invokes compiler commands directly from the tasks.json file, without a Makefile. |
| QNX CMake Project | To create an application or library project which uses the CMake build system, in conjunction with the QNX compiler tool chain. |
| Other | To create a project with no default configuration which can be customized as desired. |
Creating a QNX project
- Click the QNX extension icon on the Primary Side Bar to open the QNX menu.
- Expand QNX COMMANDS, then click Create new
Project... under Projects:

- Enter a name for the project.
- Select the project type (QNX Recursive Makefile,
Simple Makefile, None,
QNX CMake Project, or Other):
- Select the project language (c or cpp).
- Select the artifact type (Executable, Shared
Library, or Shared Library and Test
Executable).
The project is created and you can view the directory structure in the workspace.
Generating an example project
- Expand QNX COMMANDS, then click Generate QNX Example Projects... under Projects.
- Select a project from the list of example projects in the dropdown menu.
The project is created and you can view the directory structure in the workspace.
CAUTION:
The QNX Toolkit extension requires a trusted workspace. In
Restricted Mode, the QNX icons don't show up in the VS Code Activity Bar.
Page updated: