This chapter shows you how to print in Photon. The following topics are covered:
Before you can print files, you must select a printer from the Photon Printer Setup dialog. To do this:
Or

If Printer Setup is running but hidden, you can find it by clicking on the Printer Setup icon in the Taskbar:

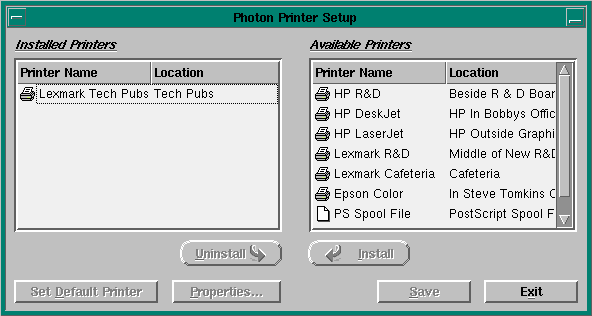
The Printer Setup dialog looks like this:
 |
If there are no printers listed in the Available Printers pane, talk to your system administrator or refer to the Photon Installation & Configuration guide on how to install printer drivers for your system. |
Here are the main parts of the Printer Setup dialog:
You use the Photon Printer Setup dialog to choose a default printer and optionally select other printers you might use. To set up a printer:
Only one printer can be set as the default printer. If you select only one printer, it automatically becomes the default. If you select more than one printer, the printer at the top of the Installed Printers list is the default printer. To change the default printer:
The printer is moved to the top of the list. The Set Default Printer button changes to Is Default Printer.
Whenever you print from a Photon application, the printer you choose as the default is displayed in the Printer field. Before you print, you can accept the default printer, or choose from any of the printers in the pull-down printer list.
If you haven't set up a printer prior to printing (for example, you selected a Print command from an application's File menu before clicking on the Printer Setup icon), you'll be prompted to set one up. The following dialog appears:
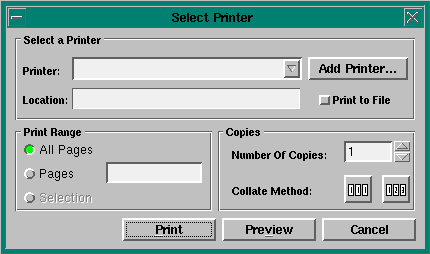
To select a printer:
 |
Click on Add Printer...
The Photon Printer Setup dialog appears. Follow the instructions in the "Setting up a printer" section. |
| If you want to: | Do this: |
|---|---|
| Select a printer | Accept the default printer. If more than one printer has been installed, you can select a printer from any of the printers displayed in the pull-down printer list. |
| View a document on screen | Click Preview. For more information, see the section on "Print Preview dialog." |
| Print a range of pages | Click Pages and enter the page number or range of page numbers that you want printed (e.g. 3-5). |
| Print multiple copies | Enter the number of copies required in the field. |
| Change the collate method | Select "111" if you want multiple copies of each page all at once, or "123" if you want a collated set. If you don't select either, the pages are printed in the order set by the printer. |
| Print to a file | Choose Print to File, then specify the filename. If you select "BMP Spool File" or "PS Spool File," the image is automatically sent to a file. |
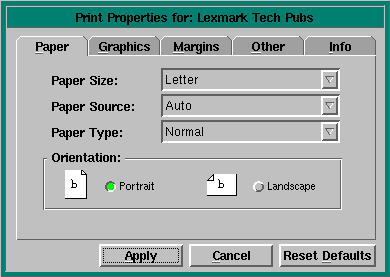
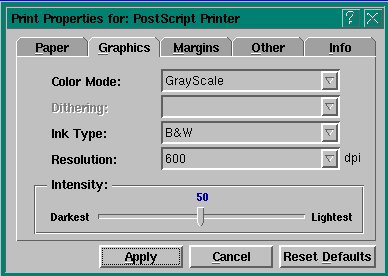
You can view the print properties for the selected printer by clicking the Properties button in the Photon Printer Setup dialog. There are currently two print property dialogs:
Five tabs display properties information:
|
For the following tab options, the values for the print properties displayed on your screen may differ from those in this guide because the supported values for an option are customized in the printer definition file. For more information, see the Printing Support chapter in the Photon Installation & Configuration guide or ask your system administrator. |
You use the Paper tab to select print properties such as paper size, paper source, type, and orientation.
You use the Graphics tab to change graphic properties like color mode, dithering type, ink type, and resolution.
You use the Margins tab to change the printer margins:
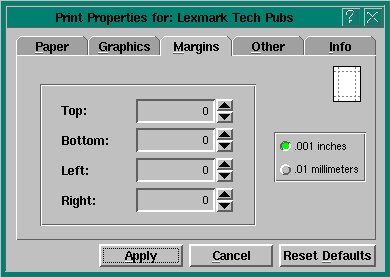
Margin settings may be set in inches or millimeters. Use the up and down scroll arrows to increase or decrease the setting. The default is .001 inches.
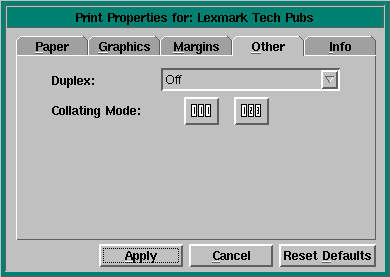
You use the Other tab to specify single or double-sided printing and the collating method.
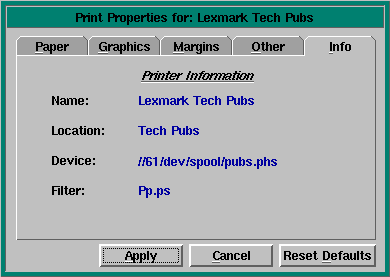
You use the Info tab to view the selected printer's name, location, spool device, and spool filter information.
You can view the printer properties for images by clicking the Properties button in the Photon Printer Setup box when the BMP filter is chosen as the default printer.
|
Currently only BMP format properties can be set. |
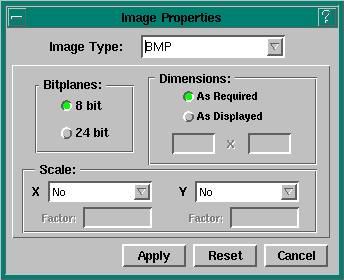
Three main areas display image property information:
Print the image using 8 or 24 bits per pixel.
Choose the dimensions of the printed image. You must specify one of these options:
Here you choose whether the image will be scaled or not. You can set the scale separately for the x and y dimensions. You can set the scale to:
You can view a document on screen from the Select Printer dialog. To do so:
|
Click Preview |
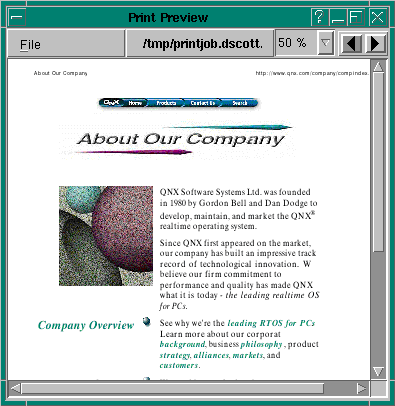
In Print Preview you can: