![[Previous]](prev.gif) |
![[Contents]](contents.gif) |
![[Index]](keyword_index.gif) |
![[Next]](next.gif) |
|
|
|
|
 |
This version of this document is no longer maintained. For the latest documentation, see http://www.qnx.com/developers/docs. |
In this chapter:
Regardless of whether you're connecting to a remote or a local target, you have to prepare your target machine so that the IDE can interact with the QNX Neutrino image running on the target.
For Windows and Linux hosts, the IDE supports host-target communications using either an IP address or a serial connection; we recommend both. If you have only a serial link, you'll be able to debug a program, but you'll need an IP link in order to use any of the advanced diagnostic tools in the IDE.
Target systems need to run the target agent (qconn). For more information about qconn, see “Target agent (the qconn daemon)” in the IDE Concepts chapter.
 |
Ensure that you occasionally check the Download area on our website for updated versions of qconn. You can use the IDE Software Updates manager (; for more information see “Updating the IDE using the Software Updates Manager” in the Getting Started chapter. |
Before you can configure your target for IP communications, you must connect the target and host machines to the same network. You must already have TCP/IP networking functioning between the host and target systems.
To configure your target for IP communications, you must launch qconn on the target, either from a command-line shell, or the target's boot script.
|
The version of the QNX Software Development Platform on your host must be the same as or newer than the version of QNX Neutrino RTOS on your target, or unexpected behavior may occur. Newer features won't be supported by an older target. |
If your target's qconn is out of date, its listing in the Target Navigator view will notify you to check the target properties:
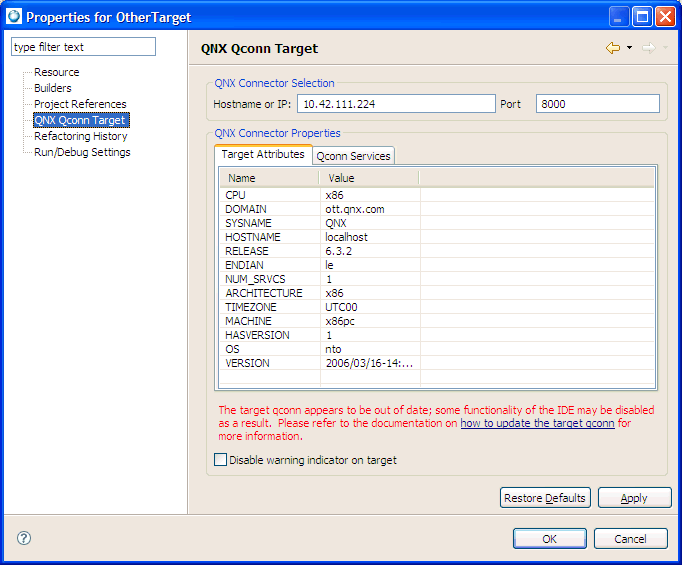
The Properties dialog for the target. The message indicates qconn is out of date.
For more information, see “Installing the qconn update,” later in this chapter.
When you set up a launch configuration, select C/C++ QNX QConn (IP). (For more information about setting up a launch configuration, see the Launch Configurations Reference chapter in this guide.)
|
The pdebug command must be present on the target system in /usr/bin for all debugging sessions; qconn launches it, as required. The devc-pty manager must also be running on the target to support the Debug perspective's Terminal view. |
Before you can configure your target for serial communications, you must establish a working serial connection between your host and target machines.
|
On Linux, disable and stop mgetty before configuring your target for serial communications. |
To configure your target for serial communications:
ls /dev/ser*
You'll see an entry such as /dev/ser1 or /dev/ser2.
devc-pty &
pdebug /dev/ser1 &
|
If you change the pdebug command to: pdebug /dev/ser1,57600 stty </dev/ser1 shows how ser1 is configured so that you can take note of the baud rate, and then specify the same number in the launch configuration. At pdebug launch time, the baud rate of the device that pdebug uses can be specified for the launch configuration (in this example, 57600). |
The target is now fully configured.
stty </dev/ser1
This command produces a lot of output. Look for the baud=baudrate entry; you'll need this information to properly configure the host portion of the connection.
When you set up a launch configuration, select C/C++ QNX PDebug (Serial). For information about launch configurations, see the Launch Configurations Reference chapter in this guide.
|
After a debug session ends, you must restart pdebug on the target because pdebug always exits. If you use qconn, you don't have to restart pdebug because it will automatically restart pdebug with each new debug session. However, if you use serial debug, you must manually restart pdebug, or use the target reset if pdebug was initiated by the startup process. The following shell script shows how to keep pdebug running so that it behaves similar to qconn:
while true
do
  pidin | grep -q pdebug
  if [ $? -ne 0 ]
  then
     echo Start pdebug
     pdebug /dev/ser1,115200
  fi
  sleep 1
done
|
Suppose you have two targets running Neutrino, such that:
To connect to the second target with the IDE, all you need to do is start qconn on the second target, and instruct it to use the IP stack of the first target, like this:
SOCK=/net/firstTargetName qconn
If you want to start qconn like this every time you boot the second target, add this command to the file named /etc/rc.d/rc.local. For more information about starting Neutrino, see the Controlling How Neutrino Starts chapter of the Neutrino User's Guide.
After you've installed the IDE, you may need to update qconn on your target systems to take advantage of some additional features. The IDE will work with older versions of qconn, but not all features will be available.
|
Only users with system administrator privileges can perform updates to qconn. |
To update qconn on your development system:
|
If you already have the latest version of qconn, or the next time you choose from the Help menu, the IDE offers to uninstall the qconn update. |
After you update qconn on your Development system, you then need to update the version of qconn on your target system. How you do this depends on your target system; you might have to build a new image, or you might simply have to copy the new version to your target.
For example, to copy a new version of qconn to a target system:
PPP is a protocol for establishing a TCP/IP network between two computers over a serial communication line. PPPD is the name for the daemon that interfaces the serial line with the TCP/IP stack on a POSIX-like system.
Once networking is established, you can use the QNX Momentics IDE debugger as if an Ethernet connection were available. In addition, you can use traditional client tools that are available on Windows (such as FTP, telnet, and TCP/IP file sharing), to access your embedded system.
For example, typical scenarios where PPP (serial) networking might be useful on an embedded system are those that:
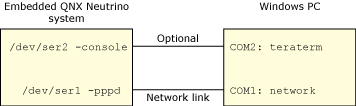
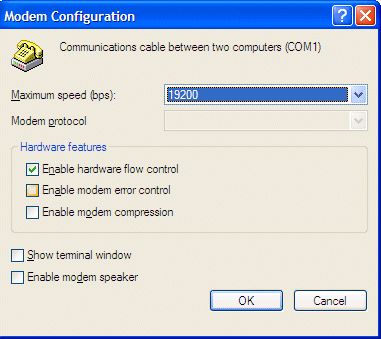
It is assumed that your embedded system has a serial driver running, and that the port /dev/ser1 is available for connection to the Windows workstation COM1. Typically, you'll utilize a cross-over serial cable for the connection.
Configuring your embedded system for network communication.
|
If you have a second serial port for your embedded system, we strongly recommend that you connect it to a terminal program (such as teraterm, hyperterm, and so on) so that you can have a console (shell) for PPP debugging purposes. Some of the diagnostic discussions below assume that you have access to a console (either the serial shown above, or a direct connect video and keyboard). |
To ensure that the cable is correct and the systems are properly communicating, you should verify that you have a working serial connection between /dev/ser1 and COM1.
To verify that your serial connection functions properly:
stty raw 115200 par=none bits=8 stopb=1 </dev/ser1
mode com1: baud=115200 parity=n data=8 stop=1
cat </dev/ser1
dir \*.* >com1:
In the Console view, you'll see a DOS directory listing.
copy com1: con:
ls /* >/dev/ser1
At the Windows command prompt, you'll see a QNX Neutrino directory listing.
Now, if you are successful, you were able to confirm that you have a working serial connection between /dev/ser1 and COM1.
QNX Neutrino implements the TCP/IP stack in an executable module called io-pkt. The versions of io-pkt are:
The io-pkt-v4-hc version is full-featured, while io-pkt-v4 eliminates some functionality for environments that have insufficient RAM. However, both v4 versions support PPP.
|
Multipoint PPP is supported only in io-pkt-v4-hc, but the example below doesn't require multipoint PPP. |
You can start the TCP/IP stack on your embedded system without a network driver as:
io-pkt-v4 &
Or
io-pkt-v4-hc &
You might notice that -ptcpip is appended to io-pkt in sample scripts, but io-pkt functions the same with or without this postfix.
Additionally, you will typically see -dname included in scripts. This command starts a particular network driver on the stack; however, in the example below, we don't use network hardware, so we can start io-pkt without a driver.
In addition to your selected io-pkt binary, you should include the following binaries in your image (.ifs):
Additionally, you must create a directory named /etc/ppp, and a file named /etc/ppp/chap-secrets. Include the following code in the chap-secrets file:
#localhost  root    "foobar"  *
*           *       "foobar"  *
The purpose of the last line of code allows any user from any host to log in with the password “foobar”.
Now, you can start PPPD for debugging purposes from a console using the command:
pppd debug nodetach -crrtscts auth +chap 10.0.0.1:10.0.0.2 netmask 255.255.255.0 \ /dev/ser1 115200
Or, from a startup script using this command:
pppd persist -crrtscts auth +chap 10.0.0.1:10.0.0.2 netmask 255.255.255.0 \
/dev/ser1 115200
For the previous command, we are specifying the network that will be established. The embedded system will be 10.0.0.1 and the other end of the link will be 10.0.0.2; it is a class C network, specified by netmask.
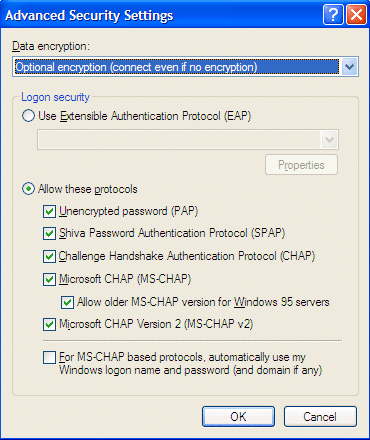
In addition, the auth +chap options indicate that the other end will be authenticated with CHAP (which is supported by Windows networking). The system will reference the chap-secrets file you created earlier to match the specified password.
Without the persist option in the command, the connection will terminate after a timeout, or after one successful connection.
Use the debug nodetach command to view the diagnostic output on the terminal where you started PPPD. You can also use Control+C to stop PPPD in this mode.
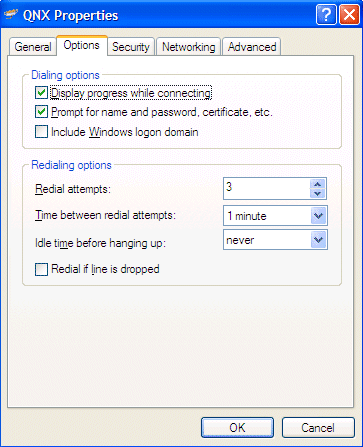
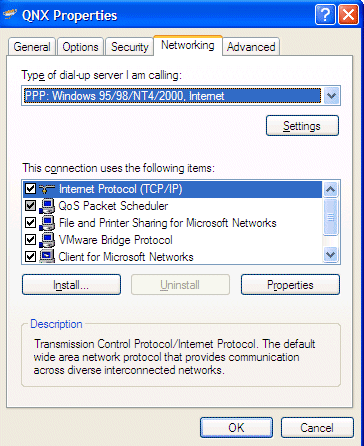
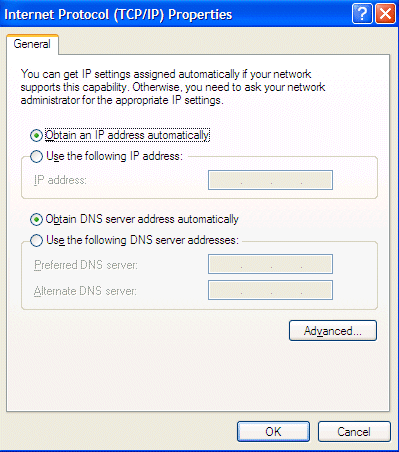
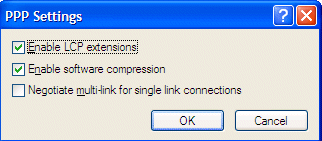
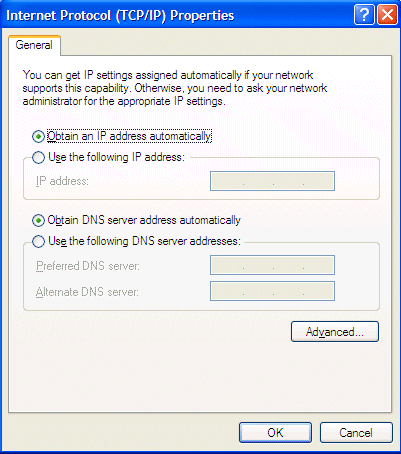
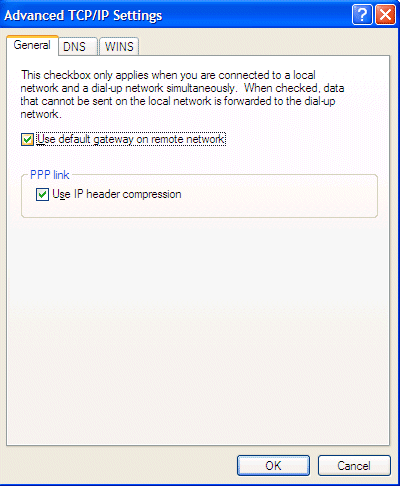
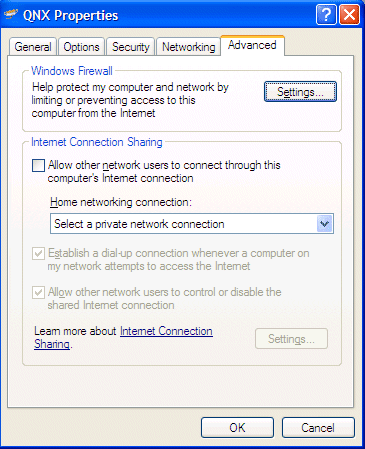
Windows networking is controlled from a Network Connections panel. The following example shows you how to prepare your target and host for debugging using a PPP connection.
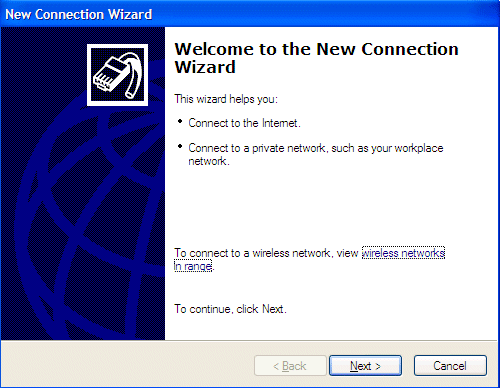
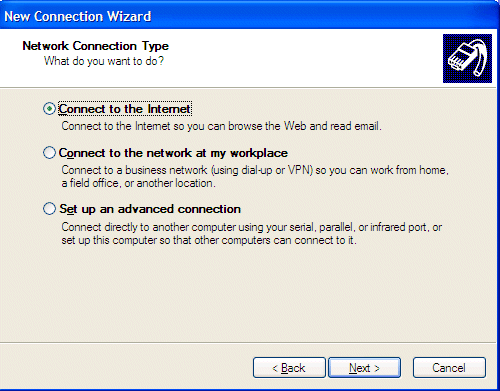
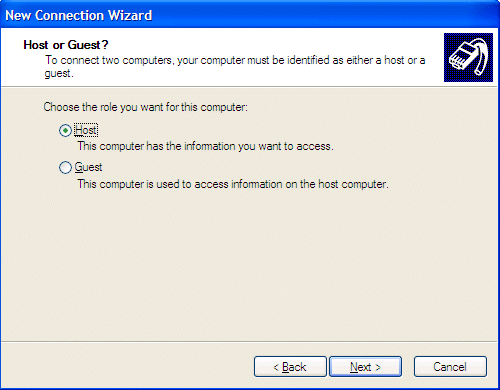
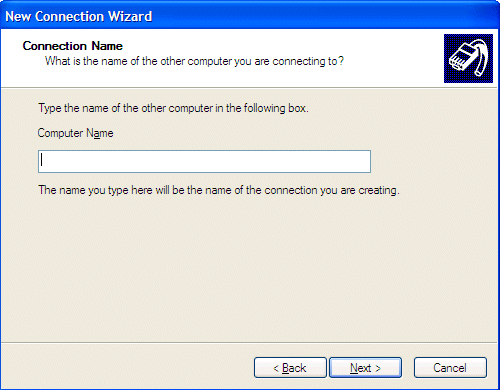
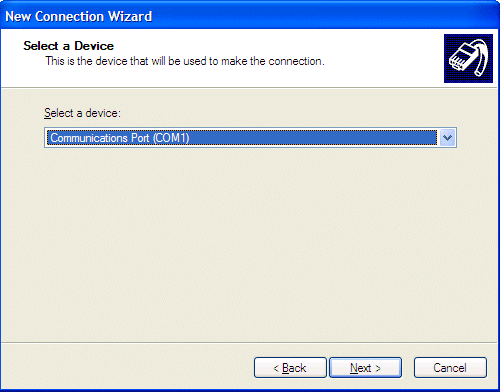
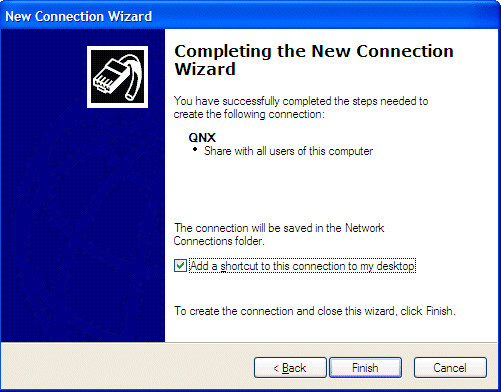
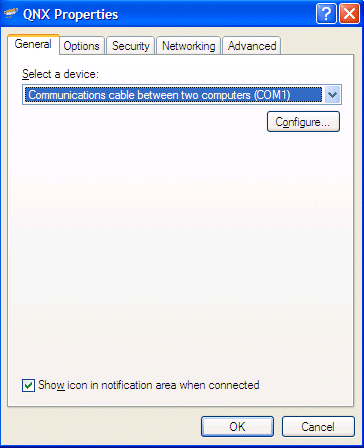
To build a connection to your embedded system:
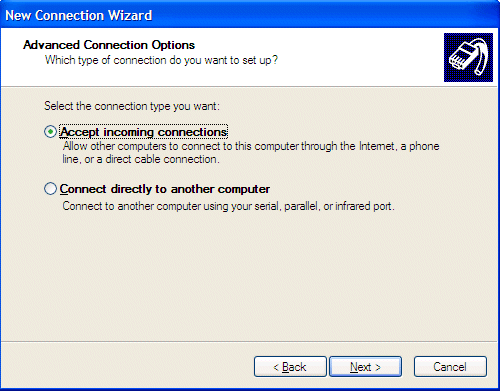
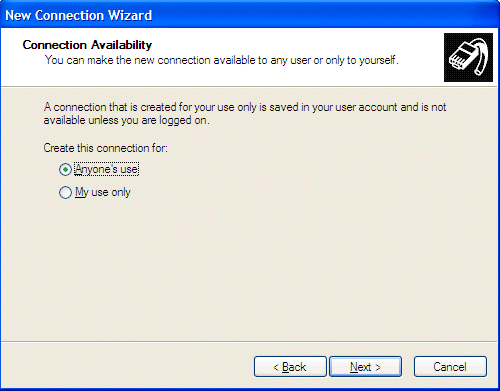
Next, the network connections dialog, Connect, is displayed. Now, you'll have to provide the login credentials and configure the network connection to the machine you specified earlier.
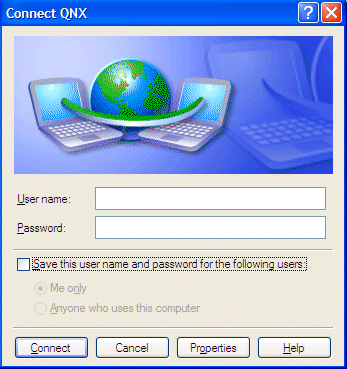
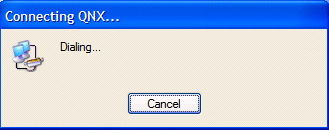
The Connect dialog is displayed.

While Windows waits to receive, the Connecting dialog is displayed.
Once communication begins, the following dialog is displayed:
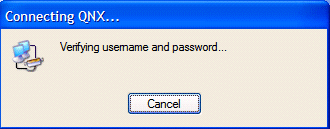
Once the connection is established, the verification Connecting dialog closes, and a network icon is added to the Taskbar. To disconnect, you can right-click on the Taskbar icon and select Disconnect. You can reconnect as often as you wish without rebooting the target.
While connected, from Windows type ipconfig, and you should notice the following output:
PPP adapter QNX:

        Connection-specific DNS Suffix  . :
        IP Address. . . . . . . . . . . . : 10.0.0.2
        Subnet Mask . . . . . . . . . . . : 255.255.255.255
        Default Gateway . . . . . . . . . : 10.0.0.2
In addition, you should also be able to successfully ping 10.0.0.1.
If you started qconn on your target, you can now use QNX Momentics IDE to debug a program for a qconn/IP debug session.
|
Before you configure this type of connection, you'll need to consider the following:
|
The IDE lets you connect to a Photon session on a target from a Windows host machine and interact with the remote Photon system as if you were sitting in front of the target machine.
To prepare your target for a Phindows connection:
phrelay stream tcp nowait root /usr/bin/phrelay phrelay -x
slay inetd
inetd
The inetd daemon starts and you can connect to your target using Phindows.
For details about using Phindows, see the Phindows Connectivity User's Guide in your QNX Software Development Platform documentation set.
|
|
|
|