This chapter describes how to generate, organize, compile, and run the code for a PhAB application:
PhAB automatically generates everything that's required to turn your application into a working executable, including:
By doing all this, PhAB lets you get on with the job of writing the code that implements your application's main functionality.
For most code generation, you use the Build & Run dialog. However, you can also generate some C and C++ stub files on the spot when using various dialogs to develop your application; use the icons that are located next to function or filename fields:

This means you're free to edit a callback function while still in the process of attaching it to the widget. You don't have to go into the Build & Run dialog, generate code from there, and then come back to write the function.
Think of the Build & Run dialog as the development center for building your applications. From this dialog, you can:
To open the Build & Run dialog, choose the Build & Run item from the Application menu or press F5.
 |
If the Build & Run item is dimmed, your application hasn't been named yet. For more info, see "Saving an application" in the Working with Applications chapter. |
PhAB automatically saves your application when you open the Build & Run dialog.

Sample Build & Run session.
The scrolling list displays the application source files that PhAB has generated, as well as any you've created by hand. This list may be empty if you're designing a new application and haven't yet generated any code.
When you make changes to your application, even within your own source files, you may need to generate the application code. Doing so ensures that the prototype header file, proto.h, is up to date. You can safely generate the code at any time - PhAB won't overwrite any code you've added to the stubs it generated earlier.
Before generating the code, PhAB saves your application if you've modified any modules. To minimize compile time, PhAB compiles only the files that have changed.
|
If you plan to use a global header in your application, you should set up the header before generating any code. For more information, see "Specifying application startup information" in the Working with Applications chapter, and "Global header file" in the Generating, Compiling, & Running Code chapter. |
To generate your application code:
The file list now shows all the generated code files.
PhAB generates various files and stores them in the application's src directory.
 |
Any filename that starts with ab is a PhAB file and shouldn't be modified at any time. If you try to edit an ab file, you could lose work (when PhAB overwrites the file) or experience incorrect behavior (when files get out of sync). |
You can modify any other files that PhAB generates, with few conditions. These conditions are described in the following sections.
Here are the files that PhAB generates:
Here are the files you need to save if you're using version-control software (PhAB can generate some of them, but it's a good idea to save them all):
You'll need to keep a matched set of all the files that PhAB generates; save the same version of the abapp.dfn, src/ab*, and wgt/*.wgt? files.
It's easier to save a PhAB application in CVS than RCS. Here are some things to keep in mind:
This way, if you just check out an application, your copy of abapp.dfn is read-only and PhAB doesn't let you load the application. If you do want to modify the application, you have to run cvs edit abapp.dfn, which makes the file writable. Even though this doesn't prevent other people from doing the same, it at least adds you to a list of "editors" on the CVS server that other people can query.
PhAB generates function prototypes that are used by the compiler to check that your functions are called correctly. These prototypes are placed in abimport.h and optionally in proto.h. Here's how these files compare:
| proto.h | abimport.h |
|---|---|
| Generated by parsing your source code. | Generated by looking at your application's settings. |
| Prototypes for all functions are generated. | Only prototypes known to PhAB (callbacks, setup functions, pointer-to-function resources) are generated. |
| You can have problems with preprocessor directives (see "Potential problems with generating proto.h"), unusual C constructs, syntax errors, and C++ code. | Prototypes don't depend on the source code. |
| Doesn't work with C++. | Contains the appropriate #ifdefs and extern "C" declarations required by C++. |
| Prototypes match what the functions look like. | Prototypes match what the functions are supposed to look like-if the source code is different, the compiler can detect it. |
To suppress the generation of prototypes in proto.h:
In the interests of speed, the program that scans your source files for function prototypes ignores preprocessor directives. This can cause some problems in proto.h.
For example, say we have the following code:
#ifdef DOUBLE
    for (i = 0; i < 18; i++, i++) {
#else
    for (i = 0; i < 18; i++) {
#endif
        x += 2 * (i + x);
        y += x;
    }
Since preprocessor directives are ignored, the prototype generator sees:
    for (i = 0; i < 18; i++, i++) {
    for (i = 0; i < 18; i++) {
        x += 2 * (i + x);
        y += x;
    }
The two opening braces will cause it some confusion, and an incorrect prototype will be generated. Look for this type of thing if the prototype generator is creating incorrect prototypes.
To fix the example above, we could remove the opening braces and put an opening brace on the line after the #endif. Alternatively, we could do the following:
#ifdef DOUBLE
#define ADDAMOUNT   2
#else
#define ADDAMOUNT   1
#endif

    for (i = 0; i < 18; i += ADDAMOUNT) {
        x += 2 * (i + x);
        y += x;
    }
PhAB stores each application as a directory structure. This structure consists of a main directory that holds the application-definition file, two subdirectories that store the module files and application source code, and, potentially, directories for different development platforms:
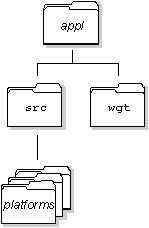
Directories for a PhAB application.
The platforms directories are created if you generate your application for the first time after having installed Watcom C version 10.6 or later. You can choose the platforms on which to compile your application.
|
You should choose default as the platform unless you specifically need a different one. If you choose default, new versions of the compiler will be used automatically when they're installed. |
Here's what each directory contains if you generate your application for the first time after installing Watcom 10.6 or later:
For detailed information on the files stored in this directory, see "What PhAB generates" in this chapter.
|
Always use PhAB to edit the module files in the
wgt directory. Don't try to edit these
binary files with another editor.
Never modify any files prefixed by ab. |
Here's what each directory contains if you first generate your application before installing Watcom 10.6 or later:
For detailed information on the files stored in this directory, see "What PhAB generates" in this chapter.
|
Always use PhAB to edit the module files in the
wgt directory. Don't try to edit these
binary files with another editor.
Never modify any files prefixed by ab. |
You can convert your application to multiple platforms after installing Watcom 10.6 or later, but it isn't necessary; PhAB works with both types of application.
To convert to multiple platforms, choose Convert to Multiplatform from the Application menu. PhAB moves any existing Makefile to src/default/Makefile.old. Use the Generate command in the Build & Run dialog to generate a new Makefile for the desired platforms, and then edit them to propagate any required changes from the old Makefile to the new.
Once you've generated your application code, you'll see the C and/or C++ source code modules displayed in Build & Run's file list. Next to the file list, you'll see several buttons to perform various actions on the files.
To edit, view, or delete source code:
You can also edit a file by double-clicking on its name.
To choose which editor or browser the Edit and View buttons will invoke, see "Customizing your PhAB environment" in the chapter on PhAB's Environment.
To create a new source-code module:
If you create any files, click on the Refresh button to reread the application directory and refresh the list of files on the left side of the Build & Run dialog,
To control which files are displayed in the Build & Run dialog, use the following:
After generating the application code, you need to:
PhAB lets you use the following libraries with your application:
The default is shared libraries.
Once you've chosen the library type, you're ready to compile and link.
The first time you generate your application, PhAB creates a Makefile in the src directory (plus a Makefile for each platform selected for multiplatform development) so you can make the application. Subsequent generations don't modify the file directly; instead, they update external files referenced in the Makefile.
Once the Makefile is generated you're free to modify it, with a few conditions:
The app and shr targets are used to compile and link the application with static or shared libraries. The proto target is used to generate the application prototype file, proto.h; see "Generating function prototypes" later in this chapter.
By default, the Makefile is compatible with the installed make command. You can convert the file to a format that suits the make command you prefer-just make sure the external file reference method is still compatible.
For more information, see "Including non-PhAB files in your application," later in this chapter.
To make your application:
To edit the first file that contains errors, click on Edit. After fixing the problems, click on Restart to run make again.
To stop make at any time, click on Abort.
The Done button is also enabled when you click on Abort.
By default, PhAB uses the installed make command to make your application. If you need to change this command in any way, click on the Build Preferences button.
|
Any changes you make to Build Preferences settings are saved with the application itself rather than as a global preference. |
Once your application has been compiled and linked without errors, it's ready to run. Just follow these steps:
|
When your application runs, its working directory is the one that's displayed in the Build & Run dialog. |
If you use functions such as printf() in your application, the output goes to your console if you run your application from PhAB. To see this output:
Or
PhAB is still active while your application is running. To switch between the two, use the Window Manager's taskbar.
PhAB lets you run your application with a debugger such as wd, which can be handy if your application crashes or behaves incorrectly.
 |
To run your application from inside a debugger, click on the
Debug Application button.
The debugger will start up in a terminal window. Your application will display once you run it from the debugger. |
To switch between the debugger and the application, use the Window Manager's taskbar.
The default debugger is wd. If you need to change this command in any way, click on the Build Preferences button and edit the debugger command. For example, if you're using Watcom 9.5x, change the command to wvideo.
If you're using printf() calls to debug your program, the easiest way to see the output is to change the default debugger to:
pterm -z
When you click on Debug Application in the Build & Run dialog, PhAB creates a pterm, which runs your application. The program's output appears in the pterm window. The -z option makes the pterm window remain open until explicitly closed. For more information on pterm, see the Photon Installation & Configuration guide.
You can even use printf() and wd together by setting the default debugger to:
pterm wd
When you click on Debug Application in the Build & Run dialog, PhAB starts pterm, which starts wd, which starts your application. You can then use wd and see the program's printed output.
|
Any changes you make to Build Preferences settings are saved with the application itself rather than as a global preference. |
Your application can include files that aren't created with PhAB, but you need to tell PhAB how to find them.
PhAB generates empty lists in the following files in the src directory, and you can edit them:
MYHDR = ../header1.h ../header2.h
MYOBJ = file1.o file2.o
MYSRC = ../file1.c ../file2.c
|
Remember to specify the filenames relative to where the
Makefiles are
found. For a multiplatform application, that's relative to the
platform directory:
|
If you generated your application for the first time before installing Watcom 10.6, you won't have the indHfiles, indOfiles and indSfiles files. Instead, you'll find MYHDR, MYOBJ and MYSRC in your Makefile, and you can specify filenames there.
|
Remember to specify the filenames relative to where the Makefile is found. For a single-platform application, that's relative to the src directory. |
If your application uses a library that isn't included by default in the Makefile, you can add it by editing the following variables: