The first step in creating a Qt App is to create a project in Qt Creator.
This section and the sections that follow show you how to write, package, and deploy a "Hello World" application that can be displayed in the Apps Section screen of the QNX CAR HMI. You must have QNX QDF and Qt Creator installed before you can create such Qt apps; for instructions on installing and configuring these components, see "Preparing your host system for Qt development".
To create a Qt project:
-
In the Projects dialog, choose Other Projects,
then Empty Qt Project, and then click Choose...
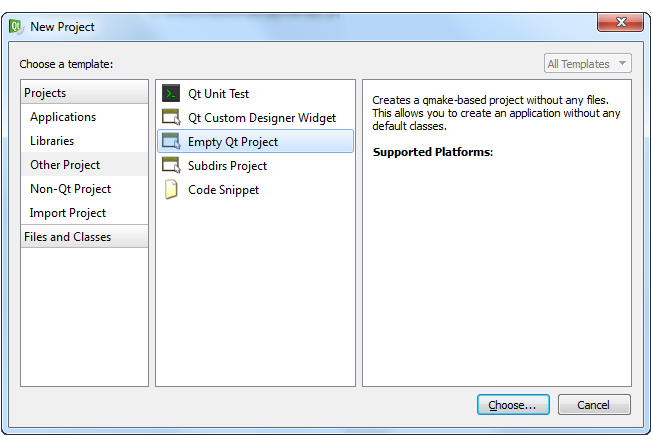
Qt Creator displays the Empty Qt Project configuration dialog.
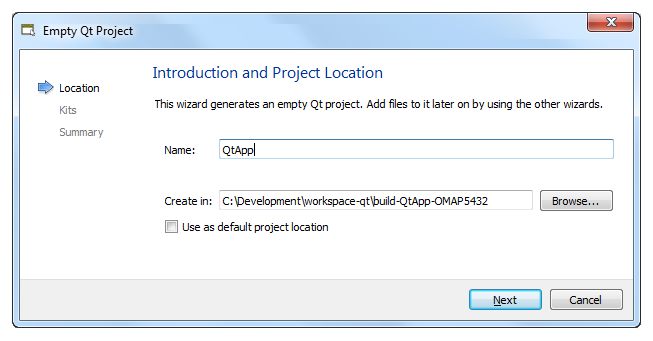
-
In the Location page, name the project QtApp, then click Next.