After defining a QNX device to represent your target system, you must set up a toolchain in Qt Creator. The toolchain defines the build and run environment based on the QNX QDF installation and the compiler, debugger, and target device configurations.
-
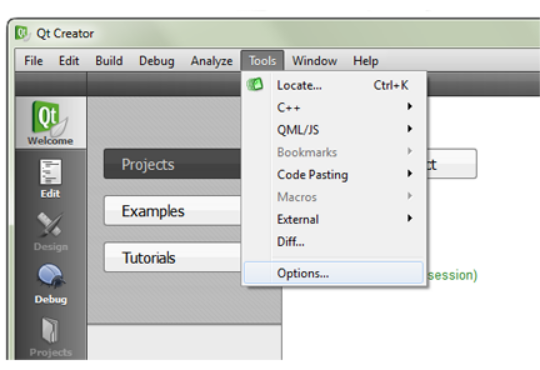
In the IDE, select the Tools menu, then click Options
to open the Options dialog.
-
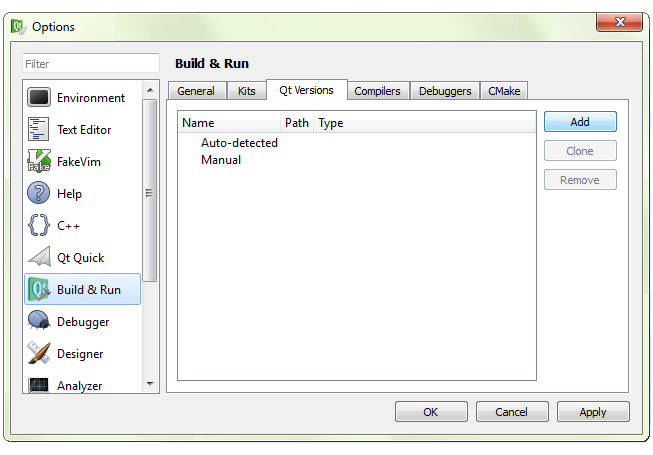
Choose Build & Run in the left-side menu, click the Qt Versions tab
in the main viewing area, then click the Add... button on the right side.
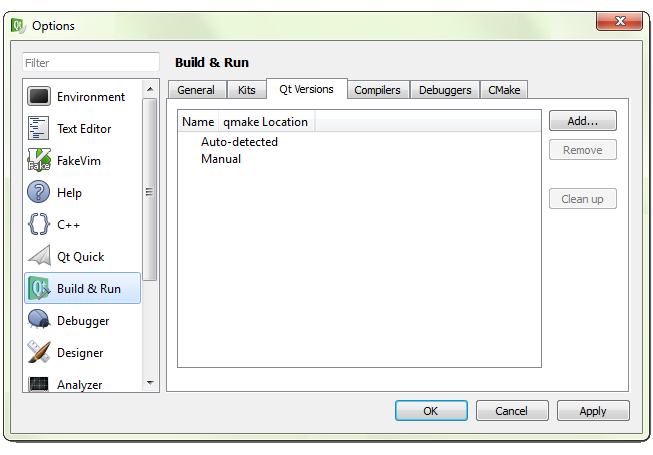
The IDE opens a file selector.
-
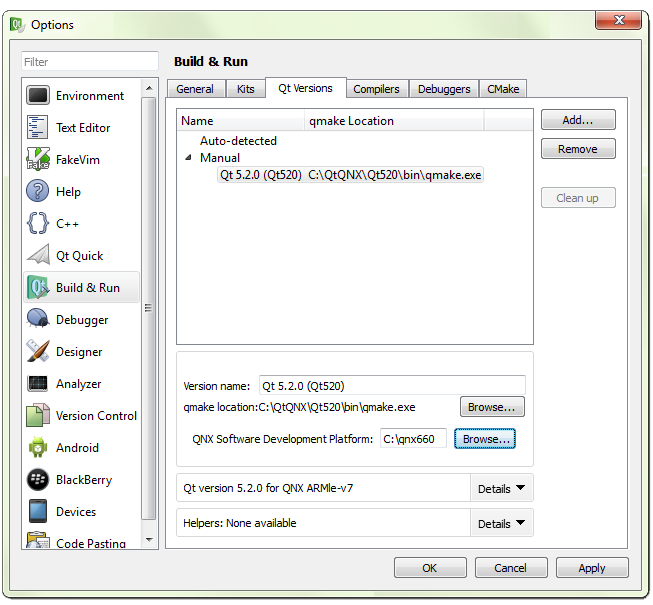
In the file selector, either navigate to C:\QtQNX\Qt520\bin and select
qmake.exe (on Windows) or navigate to /base/qt5-5.2/bin and select
qmake (on Linux), then click Open.

The Options dialog displays additional fields for configuring the selected Qt version.
-
At the bottom of the dialog, on the line that reads QNX Software Development Platform, click
Browse....
The IDE opens another file selector.
-
Click the Compilers tab, click the Add button on the right side,
then select QCC from the dropdown list.
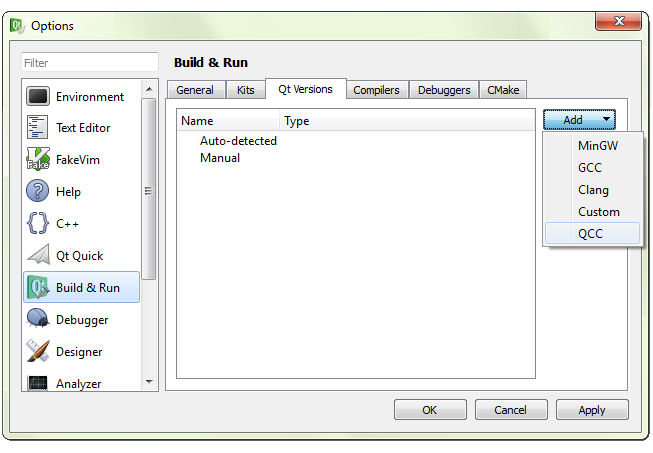
The Options dialog displays additional fields at the bottom for configuring the newly added compiler.
-
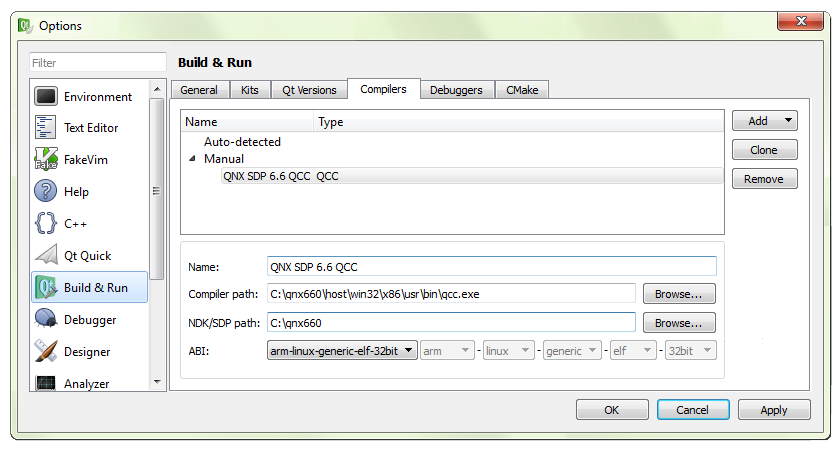
Fill in the compiler fields:
- In the Name field, enter QNX SDP 6.6 QCC.
- On the Compiler path line, click Browse... to open the file selector. On Windows, navigate to DEFAULT_SDP_PATH\host\win32\x86\usr\bin and choose qcc.exe. On Linux, navigate to DEFAULT_SDP_PATH/host/linux/x86/usr/bin and choose qcc. Click Select Folder to confirm the setting.
- On the NDK/SDP path line, click Browse... to open the file selector, navigate to DEFAULT_SDP_PATH, then click Select Folder.
- In the dropdown list for ABI, select arm-linux-generic-elf-32bit.
-
Click the Debuggers tab, then click the Add button on the right side.
The Options dialog displays additional fields at the bottom for configuring a new debugger.
-
Fill in the debugger fields:
- In the Name field, enter QNX SDP 6.6 GDB.
- On the Path line, click Browse... to open the file selector. On Windows, navigate to DEFAULT_SDP_PATH\host\win32\x86\usr\bin and choose ntoarmv7-gdb.exe. On Linux, navigate to DEFAULT_SDP_PATH/host/linux/x86/usr/bin and choose ntoarmv7-gdb. Click Select Folder to confirm the setting.

-
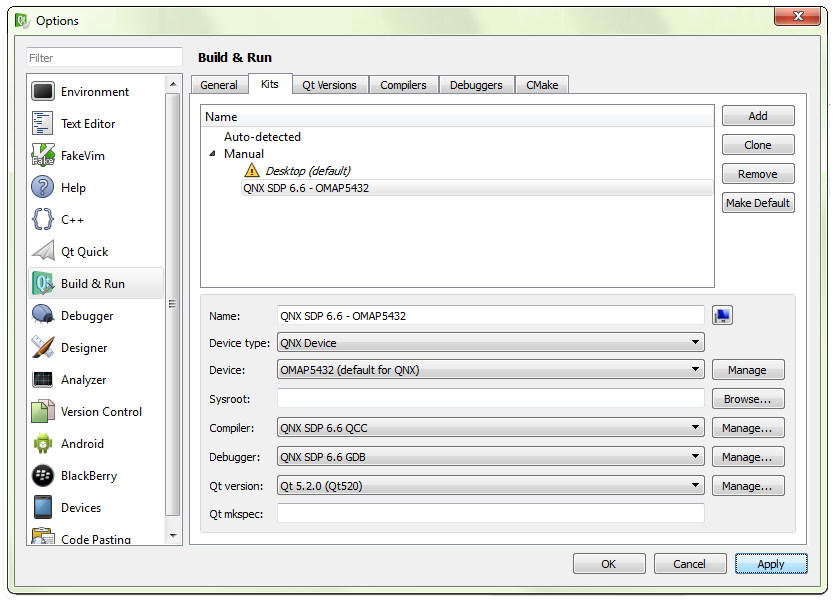
Click the Kits tab, then click the Add button on the right side.
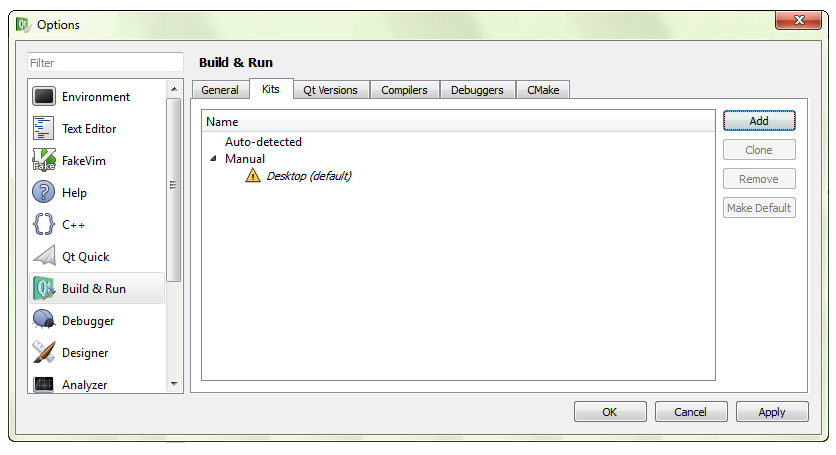
The Options dialog displays additional fields at the bottom for configuring a new kit.
-
Fill in the kits fields:
- Name the kit something meaningful, like QNX SDP 6.6 – OMAP5432.
- In the Device Type dropdown list, select QNX Device.
- In the Device dropdown list, select the device configured earlier (e.g., OMAP5432).
- In the Compiler dropdown list, select QNX SDP 6.6 QCC.
- In the Debugger dropdown list, select QNX SDP 6.6 GDB.
- In the Qt version dropdown list, select Qt 5.2.0 (Qt520).