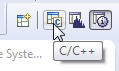
Now switch back to the C/C++ perspective by choosing its icon in the right side of the toolbar:
If you didn't do so when you created the project, you need to select compilation with or without debug information. To do this, right-click the project name in the Project Explorer view, and then choose Properties. Click QNX C/C++ Project, click Build Variants, and then expand the x86 item. Make sure that both the debug and release variants are checked. Click OK; the IDE offers to rebuild the project.
During the creation of the QNX C Project, a QNX-made directory structure with Makefiles was generated. Now to create a binary, please right-click the project name, and then select Build Project. The compiler and linker will now do their work.
You will find the compiler output in the C-Build output in the Console view, including any errors (you shouldn't see any errors, but we've added one in the examples below):

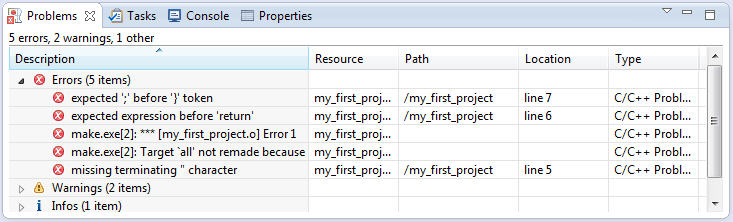
However, if errors occur during compiling, you will find the Problems view more useful, because it displays the output of the compiler in an interpreted and more readable fashion than the Console view:
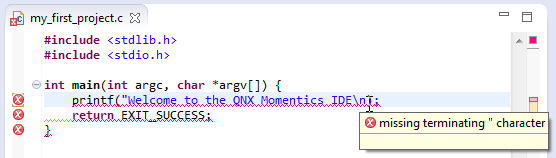
The Editor view also gives you information about an error if you leave the pointer over it:
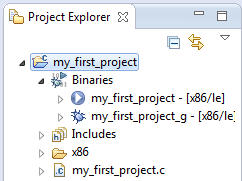
After the build operation, your binaries will be displayed in the Binaries folder. Physically, they're located in the CPU directory under o (for object) and o-g (-g for the debug option passed to the compiler). The IDE automatically created the corresponding Makefiles.
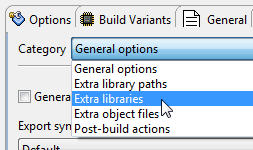
The QNX library libc.so, which contains many basic functions, is linked dynamically to your binary by default. If you want to add other libraries later, you can do so under the section. From there, click on QNX C/C++ Project, then Linker, and then choose Extra Libraries in the Category field:
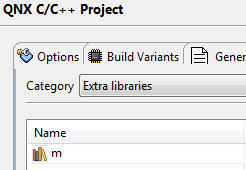
Click Add, and type the name of the library, without the lib prefix or the extension. For example, to add the math library, libm.so, you just have to type m in the Name field:
Click OK. The linker will now link the library when you build the project.