In this tutorial, you'll use the IDE's Import wizard, which lets you import existing projects and files (including files from ZIP archives) into your workspace.
Note: You can use various methods to import source into the IDE. For details, see "Importing projects".
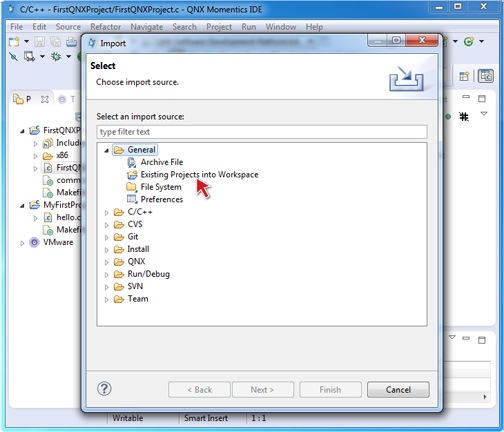
Follow these steps to bring one of your existing C or C++ projects into the IDE:
-
In the Import wizard, select .
-
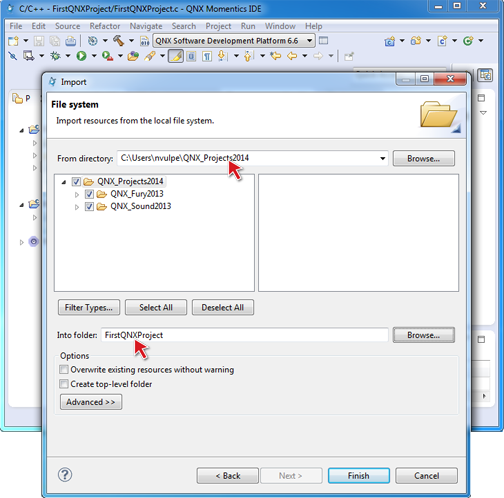
In the Projects list, select the projects that you want to import from the
location you specified.
Use the following buttons to help you make your selections:
- Filter Types ... — Open list of extensions to filter imported files by their extensions (e.g. Import only files with the .c extension.)
- Select All — Select all of the projects that were found for import.
- Deselect All — Deselect all projects in the list.
Congratulations! You've just imported one of your existing projects into the IDE.