You must build your project before you can create a launch configuration.
To create a launch configuration:
-
In the Project Explorer view, right-click a project and select either
Debug As or Run As, then click
C/C++ QNX Application.
The IDE creates a default launch configuration and opens the Debug Configurations or Run Configurations dialog (depending on which menu option you selected):
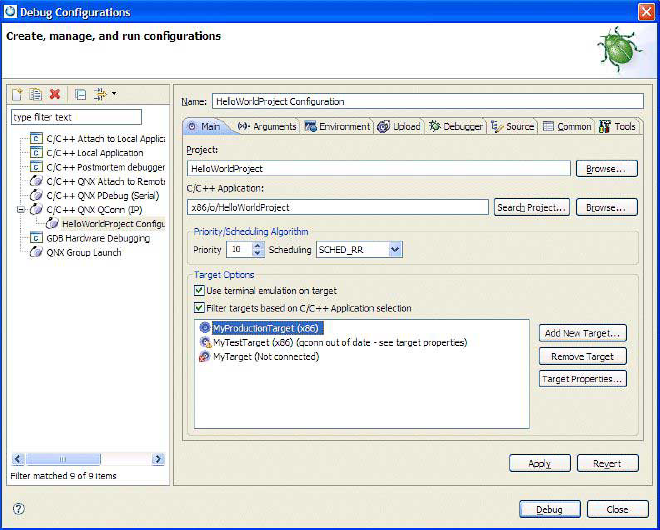
The launch configuration is now listed in the
Run Configurations and Debug Configurations dialog.
By default, the project is associated with this new launch configuration.
You can run or debug the project simply by clicking Run or Debug
in the bottom right corner. When finished, click OK to close the dialog.
Note: At any time, you can access and edit the launch configuration by right-clicking your project and choosing
or
from the context menu, then selecting the launch configuration in the left-side navigation pane.