If this is a re-install or update of Ripple, make sure to clear the cache in Chromium and uninstall the old plug-in if you are having trouble.
Certain newer versions of Chromium are incompatible with Ripple. You can obtain a version of the Chromium open source browser that's compatible with Ripple by downloading the archive file Browsers.zip from the QNX CAR platform Foundry27 project. The archive file is found in the File Releases > QNX CAR platform 2.0 RR - Ripple directory.
You must also have a web server running on your system. Mac OS comes with the Apache web server. You can set up this same type of web server on Linux systems as well. On Windows systems, you can download the Windows, Apache, MySql, and PHP (WAMP) installer to set up the Apache web server.
To install and activate Ripple:
-
Download the Ripple package file from the QNX CAR platform Foundry27
project.
- Go to the File Releases page.
- Look under the QNX CAR platform 2.0 RR - Ripple directory area to find the package file for Ripple version 1.0.4.
- Click the link for the package file and follow your browser's instructions to save the file on your computer.
-
Unzip the package contents.
The top-level directory of the package contains:
- the Apps directory, which contains the Ripple emulations for the Car Control, Media Player, and Navigation apps; these emulations are packaged as WebWorks extensions stored in separate subdirectories
- the Extension directory, which contains the files for the Chromium browser extension that implements the Ripple emulator
- a README.txt file, which contains an abbreviated version of these instructions.
- Place the directories containing the WebWorks extensions for the emulated apps (the directors for CarControl, MediaPlayer, and the Navigation apps) and the directory containing the web app files common to all apps (the common directory) in a location accessible to your web server. By default, the directories are located in <unzip_location>/Ripple.1.0.4/Apps/. These directories can be placed on your local machine or on the network but they must be visible to the web server.
-
Open the Chromium browser and navigate to the dialog box for loading extensions
by selecting the following sequence of menu options: .
Note: Ensure the Developer Mode option, located near the top of the Extensions tab, is checked when you click Load unpacked extension.
-
In the extension loader dialog box, navigate to where you unpackaged the
chromium directory, which contains the Ripple
extension, and then select this directory. By default, it is
<unzip_location>/Ripple.1.0.4/Extension/chromium/.
The Chromium browser displays a warning that the extension manifest used by
Ripple is outdated. This issue is known to the Ripple team and is being
addressed.
Later, you'll specify the address of the landing page of your own "Hello World" app in the Chromium address bar.
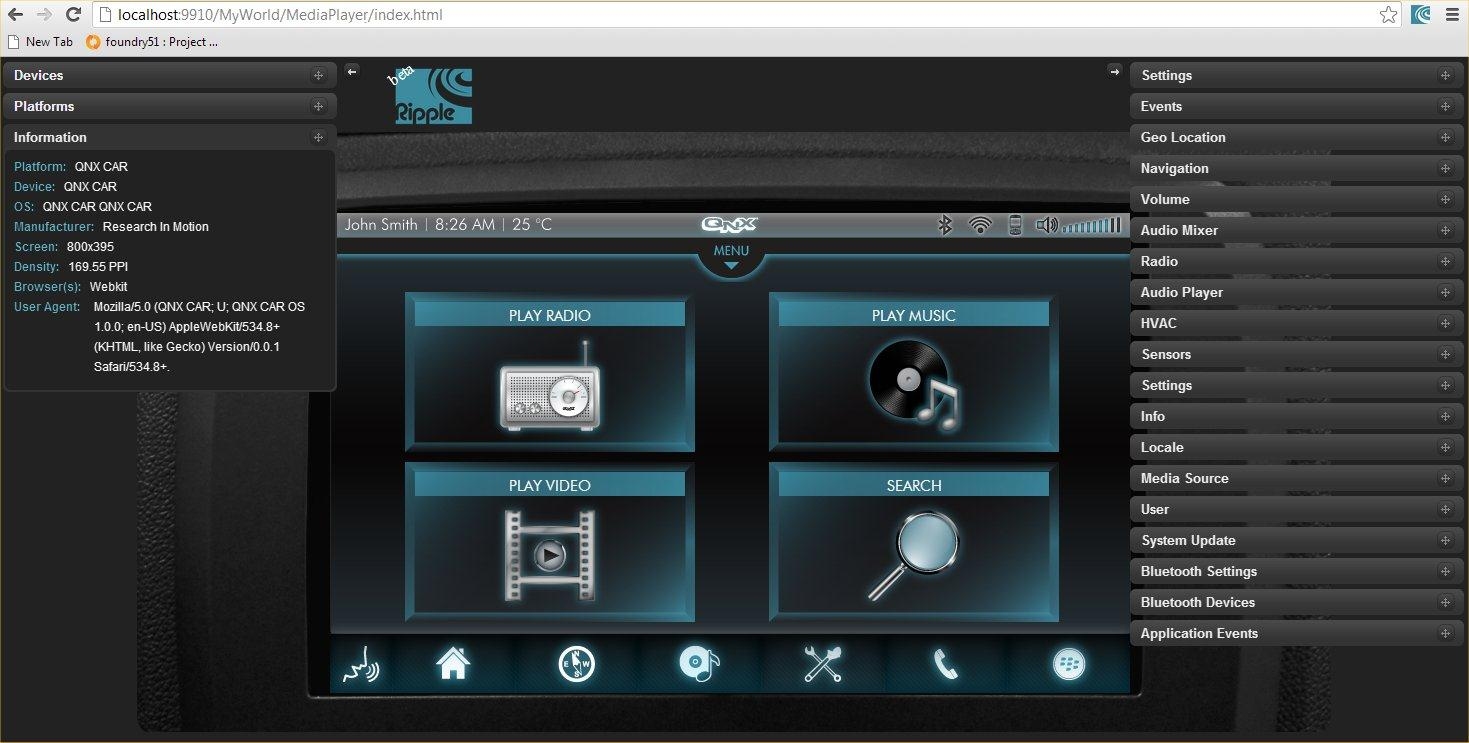
Note: Initially, your app's landing page will be rendered as a normal web page. - We'll test one of the included extensions for Media Player by specifying the address for MediaPlayer as follows: http://localhost/<directory_path>/MediaPlayer/index.html
-
Enable
Ripple by right-clicking on the page and then selecting in the popup menu. You can also enable Ripple by clicking the
Ripple button
 that's displayed in the top-right
area of the Chromium browser's window (beside the browser menu).
that's displayed in the top-right
area of the Chromium browser's window (beside the browser menu).
-
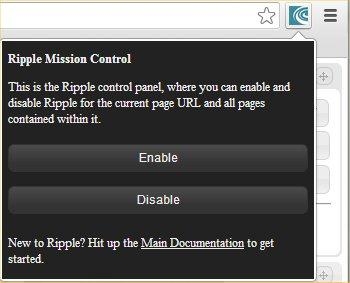
Click Enable in the Ripple Mission
Control menu.
Note: By default, your web server might listen on port 80. If you encounter difficulties with permissions or access, verify the permissions for the user. Also, if the server doesn't bind to a specific address, try 127.0.0.1, localhost:9910 or 127.0.0.1:9910.
If this is the first time you've enabled Ripple for this URL, you must select the platform that your app is intended for. The Ripple emulator remembers this selection and loads it automatically the next time you reload the URL of your app.
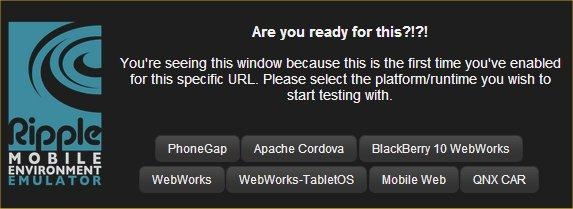
- Click QNX CAR.
-
When the emulator starts, you'll see a screen similar to the following for the
Media Player app: