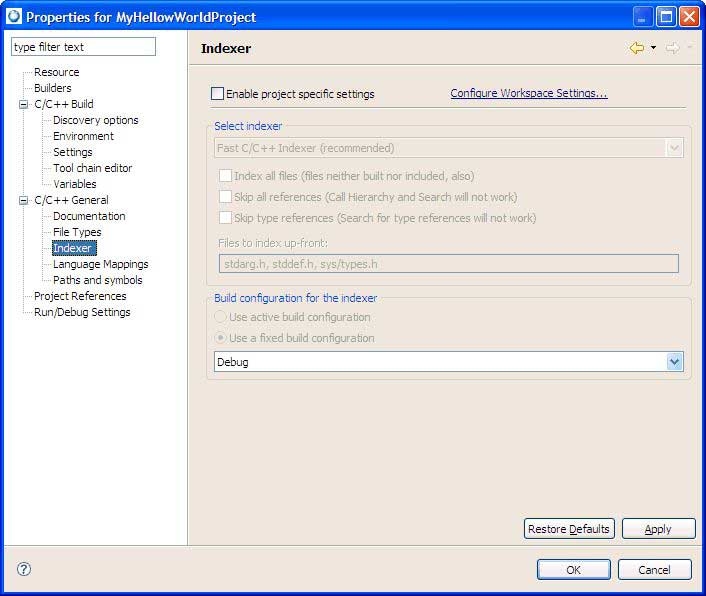
If you're building a managed Make C/C++ project, then this tab lets you control the C/C++ source code indexer. Certain features of the IDE rely on this information.

Figure 1. Controlling the C/C++ indexer on the Indexer tab.
- Enable project specific settings
- Enables specific index settings for the selected project; otherwise, common settings are applied (those defined in Preferences), and all controls below are disabled.
- Select indexer
- Specifies the indexer to use for this project. The option No Indexer disables indexing. Note that every indexer may have its own set of options.
- Build configuration for the indexer
- Since indexing takes a lot of time, using active configuration is not recommended because a reindex operation occurs after each active configuration change; the index source comes from the specified configuration, or from the active one.
Variables
- Environment variables to set
- Refer to the "Builder settings tab" section for more information about the Configuration field.
- Configuration
- Specifies the type of configuration(s) for the selected project. A Debug configuration lets you see what's going on inside a program as it executes. To debug your application, you must use executables compiled for debugging. These executables contain additional debug information that lets the debugger make direct associations between the source code and the binaries generated from the original source. A Release configuration provides the tools with options set to create an application with the best performance.
- (The variables table)
- Lists the CDT build variables and system variables, by Name, Type, and the Value. Custom build variable names are highlighted using a bold font.
- Name
- Indicates the name of the variable, either a user defined variable or a system variable.
- Type
- Shows the type for the variable.
- Value
- Specifies the value of the variable.
- Show system variables
- When selected, system variables are included in the Variables table; otherwise, they are excluded so that only user defined variables appear in the Variables list.
- Add
- Creates a new variable and corresponding value.
- Edit
- Modifies the name and value of the selected variable.
- Delete
- Removes the selected variables from the list. Note that some variables are read-only and cannot be removed.