Creating a QNX project
Project creation is done through wizards, which set up projects based on user-specified settings.
-
Switch to the C/C++ perspective by clicking its button
(
 ) in the toolbar
in the upper right corner.
) in the toolbar
in the upper right corner.
-
Select to launch the QNX Project wizard.
The New QNX Project window appears, with the All category selected.
-
Select a project category from the left-side list, click a project type in the display area on the right,
then click Next.
The available types are:
Project Type Recommended usage Empty QNX Project To create an empty QNX project. QNX Container Project To create a QNX Container project. QNX Executable To build a QNX application or utility using a traditional Makefile. QNX Legacy Recursive Make Project To create an application or library project which uses QNX's recursive make build system. QNX Library To create a QNX library built with a traditional Makefile. Qt C++/QML Application To create a Qt Application in C++ and QML. In this example, we pick the QNX Executable type.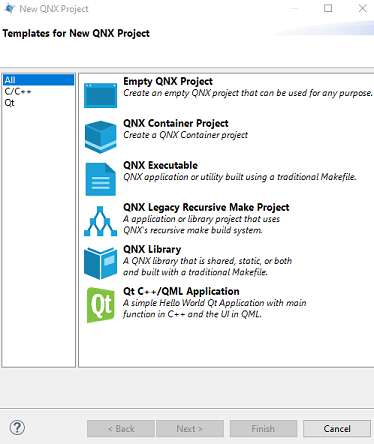
-
In the New Project dialog, enter a name in the Project name text
field.
Note:In the same dialog, you can also override the project storage location and specify the working sets that you want the project to belong to.Although the wizard allows it, don't use spaces or any of the following characters in your project name:
| ! $ ( " ) & ` : ; \ ' * ? [ ] # ~ = % < > { }These characters cause problems later with compiling and building, because the underlying tools such as make and qcc don't like them in directory and file names. -
Configure these build settings for the project:
- the programming language, either C or C++
- for QNX Library projects, the library type, either shared or static (this field isn't present for our QNX Exectuable example project)
- the CPU variants, which specify the processor architectures for which the binary files are built
- Click Finish.
- Creates the project (including the necessary source files and makefiles) and makes it visible in the Project Explorer.
- Adds an entry for the project in the Launch Configuration dropdown in the launch bar.
At any time, you can right-click the project's entry in the Project Explorer to access a context menu
that lets you do actions including but not limited to:
- renaming the project
- deleting the project
- adding, deleting, copying, or moving files
Page updated: