Creating a launch configuration for the target hardware

Earlier, you installed the Lauterbach Trace32 In-Circuit plugin to start the Trace32 Powerview using the QNX Momentics IDE launch configurations.
To create a launch configuration:
  1. Launch configurations are set up in the usual Launch Configurations dialog (accessible from Debug As > Debug Configurations… ).
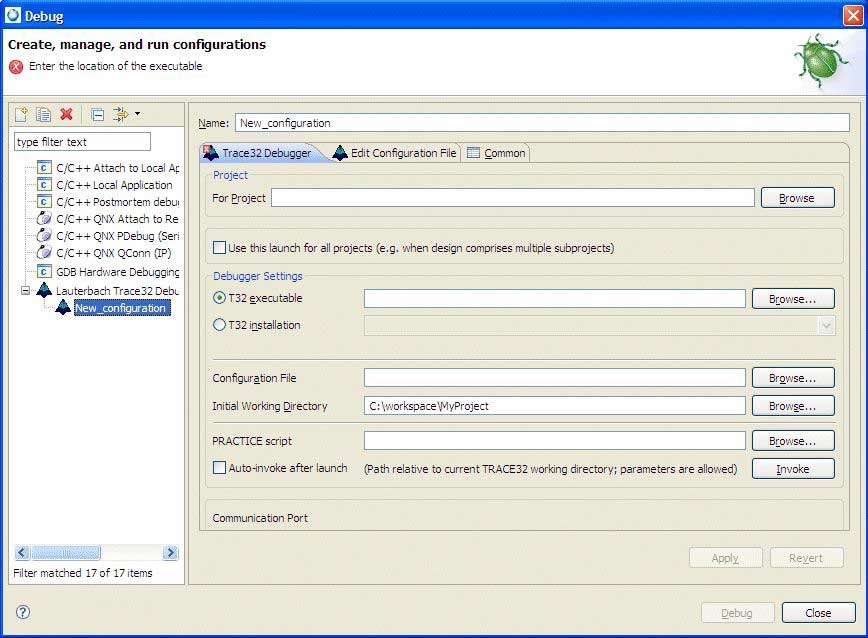
  2. In the opening dialog select Lauterbach TRACE32 Debugger and add a new configuration.
    Note: It is mandatory to have a project to use the Lauterbach Trace32 In-Circuit Debugger plugin. Breakpoint synchronization and edit-source functionality work only with files contained in a project; otherwise, the plugin doesn't know which Trace32 instance it belongs to.

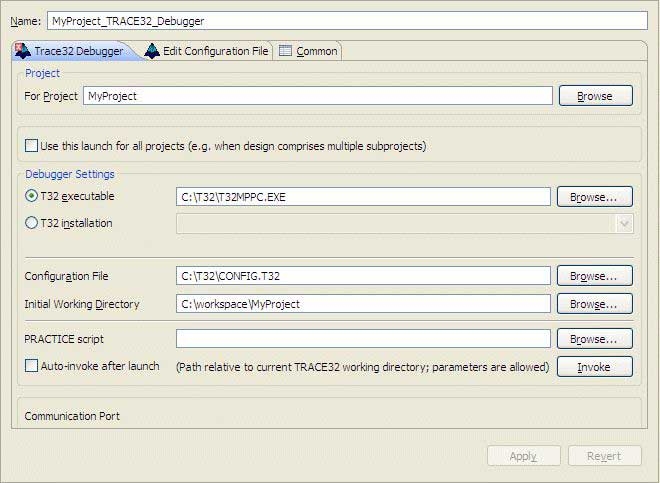
    The Lauterbach Trace32 In-Circuit Debugger launch configuration type contains these tabs: the Trace32 Debugger, Edit Configuration File, and Common.

    The Lauterbach Launch Configuration type- Trace32 Debugger tab

  3. In the T32 executable field, type the path to the Trace32 application that you want to associate with this launch configuration. By default, the Trace32 installation process will have located the executable in the folder c:\T32; however, the executable depends on your target architecture (e.g. T32MARM.EXE for ARM, T32MPPC.EXE for PPC).
  4. In the Configuration File field, type the name of the Trace32 configuration file to use with the executable. After specifying the configuration file, you may conveniently edit this file on the Edit configuration File tab.
  5. If not already present, add the following lines to your configuration file, including the empty lines at the beginning and end of the block:
    <- mandatory empty line RCL=NETASSIST PACKLEN=1024 Eclipse Plugin for Coupling 
                       with TRACE32 6 Creation of Launch Configurations PORT=20006
    <- mandatory empty line

    This configures Trace32 to accept commands via the built-in socket API which is a prerequisite for connecting with the plugin. Note that the port number used in the example (20006) is rather arbitrary, but must be unique among all concurrently active connections between Trace32 and the IDE and must not be used by other programs on the host. You don't need to configure the plugin; it will parse the chosen configuration file and extract the relevant parameters.

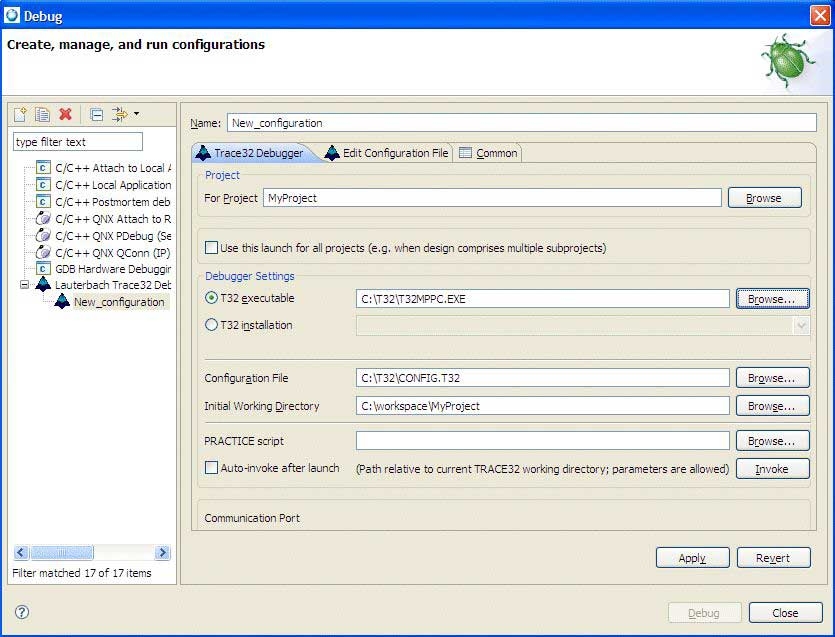
  6. To start the Lauterbach Trace32 In-Circuit Debugger, click Debug.

    Next, you'll want to create a launch configuration for the target hardware. The following steps describe how to create a launch configuration for a C++ Project written for the target hardware.

    To create a launch configuration:

    1. Open the Project Explorer view and select a project that you want to debug.
    2. Right-click on the project icon, and select Debug As > Debug Configurations… .

      Lauterbach Trace32 Debugger launch configuration type

    3. Create a new instance of the Lauterbach Trace32 Debug Configuration. Give it an appropriate name, and ensure that the Project field is correctly set to the project you're debugging.

      Lauterbach Trace32 Debugger launch configuration

    4. Under Debugger Setting, select the T32 executable option, browse to the Trace32 installation directory, and select the appropriate executable for your target hardware architecture. For example, choose t32mppc.exe for a PowerPC target.
    5. Set the Configuration File to the name of your Trace32 configuration. Unless you have created your own, this file will usually be named config.t32 and will be located in the root of your TRACE32 installation directory.
    6. Click Apply to save the configuration, and then click Close to exit the debug dialog.