![[Previous]](prev.gif) |
![[Contents]](contents.gif) |
![[Index]](keyword_index.gif) |
![[Next]](next.gif) |
|
|
|
|
 |
This version of this document is no longer maintained. For the latest documentation, see http://www.qnx.com/developers/docs. |
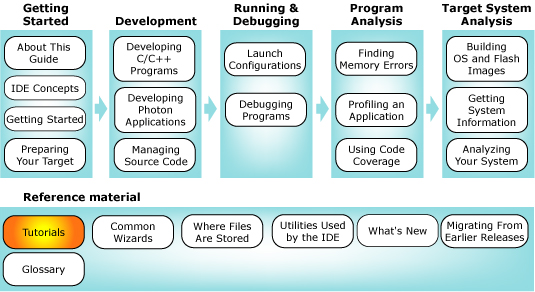
You can select a topic from this diagram:
Here are several tutorials to help you to become familiar with the IDE.
In this chapter:
Before you begin the tutorials, we recommend that you first familiarize yourself with the IDE's components and interface by reading the IDE Concepts and Getting Started chapters.
You might also want to look at the core Eclipse basic tutorial on using the workbench in the Workbench User Guide (, then ).
 |
In earlier versions of the IDE, there were two different project types: Managed make, which automatically generated a makefile, and Standard make, which required a makefile to build. Now, you are required to select a project type, and that determines the build system to use. |
In this tutorial, you'll create a simple, C/C++ project (i.e. a project that doesn't involve the QNX recursive Makefile structure).
You use the New Project wizard whenever you create a new project in the IDE. Follow these steps to create a simple "hello world" project:

A toolchain represents the specific tools (such as a compiler, linker, and assembler) used to build your project. Additional tools, such as a debugger, can also be associated with a toolchain. Depending on the compilers installed on your system, there might be several toolchains available to select from.
The fields for each panel are described in the "Project options" section, in the Wizards chapter.
To ensure the accuracy of the Project Explorer view and the ability to successfully run and debug your programs, it is important to select the correct parser. After you select the correct parser for your development environment and build your project, you can view the components of the .o file in the Project Explorer view. You can also view the contents of the .o file in the C/C++ editor.
The IDE creates your new project in your workspace. Your new project shows in the Project Explorer view, and in the Navigator view. If a message box prompts you to change perspectives, click Yes.
Now you'll create a Makefile for your project.
![]()
Here's a sample Makefile you can use:
CC:=qcc

all: hello

hello: hello.c

clean:
    rm -f hello.o hello
|
Use Tab characters to indent commands inside of Makefile rules, not spaces. |
#include <stdlib.h>
#include <stdio.h>

int main(int argc, char *argv[]) {
    printf("Hello, world!\n");
    return EXIT_SUCCESS;
}
Congratulations! You've just created your first Make C/C++ project in the IDE.
For instructions about building your program, see the section "Building projects" in the Developing C/C++ Programs chapter.
|
In order to run your program, you must first set up a Neutrino target system. For details, see:
|
Unlike C/C++ projects, a QNX C/C++ project relies on the QNX recursive Makefile system to support multiple CPU targets. (For more information about the QNX recursive Makefile system, see the Conventions for Makefiles and Directories chapter in the Neutrino Programmer's Guide.)
Follow these steps to create a simple QNX C (or C++) "hello world" project:
The New Project wizard appears.
|
Even though the wizard allows it, don't use any of the following characters in your project name (they'll cause problems later): | ! $ ( " ) & ` : ; \ ' * ? [ ] # ~ = % < > { } |
The IDE creates your QNX project and shows the source file in the editor.
Congratulations! You've just created your first QNX project.
For instructions about building your program, see the section "Building projects" in the Developing C/C++ Programs chapter.
|
In order to run your program, you must first set up a Neutrino target system. For details, see:
|
In this tutorial, you'll use the IDE's Import wizard, which lets you import existing projects, files, as well as files from ZIP archives into your workspace.
|
You can use various methods to import source into the IDE. For details, see the Managing Source Code chapter. |
Follow these steps to bring one of your existing C or C++ projects into the IDE:
The IDE shows the Import Project From Filesystem panel.
Use the following buttons to help you make your selections:
Congratulations! You've just imported one of your existing projects into the IDE.
QNX BSPs and other source packages are distributed as .zip archives. The IDE lets you import both kinds of packages into the IDE:
| When you import: | The IDE creates a: |
|---|---|
| QNX BSP source package | System Builder project |
| QNX C/C++ source package | C or C++ application or library project |
For more information on System Builder projects, see the Building OS and Flash Images chapter.
You import a QNX source archive using the standard Eclipse Import dialog:
As you can see, you can choose to import either a QNX BSP or a "source package." Although a BSP is, in fact, a package that contains source code, the two types are structured differently and generate different types of projects. If you try to import a BSP archive as a QNX Source Package, the IDE won't create a System Builder project. For this tutorial, we'll import a QNX BSP.
After you choose the type of package you're importing, the wizard then presents you with a list of the packages found in $QNX_TARGET/usr/src/archives on your host:
Notice that as you highlight a package in the list, a description for that package is shown.
To add more packages to the list:
Each source package contains several components (or projects, to use the IDE term). For the package you selected, the wizard then gives you a list of each source project contained in the archive:
You can decide to import only certain parts of the source package; simply uncheck the entries you don't want (they're all selected by default). Again, as you highlight a component, you'll see its description in the bottom pane.
The last page of the import wizard lets you name your source projects. You can specify:
|
If you plan to import a source BSP and a binary BSP into the IDE, remember to give each project a different name. |
When you finish with the wizard, it creates all the projects and brings in the source from the archive. It then prompts you to build all of the projects you've just imported.
|
If you answer Yes, the IDE begins the build process, which may take several minutes (depending on how much source you've imported). |
If you decide not to build now, you can always do a Rebuild All from the main toolbar's Project menu at a later time.
If you didn't import all the components from a BSP package, you can bring in the rest of them by selecting the System Builder project and opening the import wizard (right-click the project, then select Import...). The IDE detects your selection and then extends the existing BSP (rather than making a new one).
When you import a QNX Board Support Package, the IDE opens the QNX BSP perspective. This perspective combines the minimum elements from both the C/C++ perspective and the QNX System Builder perspective:
Congratulations! You've just imported a QNX BSP into the IDE.
|
|
|
|