![[Previous]](prev.gif) |
![[Contents]](contents.gif) |
![[Index]](keyword_index.gif) |
![[Next]](next.gif) |
|
|
|
|
 |
This version of this document is no longer maintained. For the latest documentation, see http://www.qnx.com/developers/docs. |
PhAB makes it easy to create the user interface for an application. Once PhAB has generated code stubs for your application, you'll need to write the parts that make the application do something. This chapter describes how to work with the code for a PhAB application.
It includes:
PhAB creates global variables and manifests for every module you create, and every widget with a unique instance name. This makes it easier to access the widgets from your application code.
The global variable represents the widget's name, and is defined in the abvars.h file. Each global variable takes this form:
The manifest represents the widget's instance pointer, and is defined in the abdefine.h file. This file, which is included in all application C files, also defines an external reference to the global variables. Each manifest takes this form:
 |
PhAB doesn't create ABW_... manifests for menu modules
or menu items.
Menus typically don't exist for very long, so manifests for them aren't
very useful. If you need to change the resources of the
PtMenu, create a setup function for the menu module
and do the work there. See
"Module setup functions,"
below.
The manifest for a window module refers to the last created instance of the module. See "Handling multiple instances of a window," below. |
When PhAB detects a unique instance name it generates a global variable name and a widget manifest. For example, if you change the instance name for a PtButton-class widget to done, PhAB will generate the following:
|
A widget's global variable and manifest are valid only after the widget has been created, and before it has been destroyed. |
Let's now look at some examples of how you can use the global name and widget manifest within application code. First, here's an example of using the ABN_done global variable and the ApName() function to check for a specific widget in a callback:
int
mycallback( PtWidget_t *widget, ... )

    {

    /* check for specific widget */
    if ( ApName( widget ) == ABN_done ) {
        /* done button processing */
        }

    return( Pt_CONTINUE );
    }
The next example uses ABW_done to change the done widget's background color to red (for more information, see the Manipulating Resources in Application Code chapter):
int
mycallback( PtWidget_t *widget, ... )

    {
    PtSetResource( ABW_done, Pt_ARG_FILL_COLOR, Pg_RED, 0 );

    return( Pt_CONTINUE );
    }
|
Remember that the global variable and the manifest are valid only after the widget has been created and before it has been destroyed. |
If you have more than one instance of a window module displayed at a time, then you'll have a problem accessing the widgets in the window. The problem stems from the fact that ABW_instance_name for any widget in a window module points to the last created instance of that widget. If you have more than one instance of the window, then you have more than one instance of the widgets within the window created.
Let's say you have the following window module:
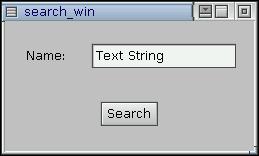
A sample search window.
Let's assume that the instance names are:
If you have two instances of the window on the screen at the same time and the user clicks on the Search button, how can you get the value in the Name text widget? Since two instances of the window exist, two instances of the text widget exist. ABW_name_txt points to the last instance of the text widget that was created.
The solution lies in the fact that ABN_name_txt can be used to refer to both instances of name_txt, provided you have the widget pointer to the window that contains the desired text widget. This is done using the ApGetWidgetPtr() function:
PtWidget_t  *window_wgt, *text_wgt;

text_wgt = ApGetWidgetPtr(window_wgt, ABN_name_txt);
Where do you get window_wgt? In the above case, you'd have a code callback on the Search button. The first parameter passed to that code callback is the widget pointer to the Search button. You can use ApGetInstance() to get a pointer to the window that contains the Search button.
So the callback would become:
int search_callback( PtWidget_t *widget, ApInfo_t *apinfo,
                     PtCallbackInfo_t *cbinfo)
{
    char        *name;
    PtWidget_t  *window_wgt, *text_wgt;

    /* Get the window that the Search button is in. */

    window_wgt = ApGetInstance( widget );

    /* Given the window, find the text widget. */

    text_wgt = ApGetWidgetPtr( window_wgt, ABN_name_txt );

    /* Now get the text. */

    PtGetResource( text_wgt, Pt_ARG_TEXT_STRING, &name, 0 );

    /* The 'name' variable now points to the correct name text.
       Process the text as appropriate. */
    ...

    return( Pt_CONTINUE );
}
PhAB generates a manifest for each internal link defined in your application:
For more information about using internal links, see the Accessing PhAB Modules from Code chapter.
PhAB lets you define one global header file for each application. PhAB generates this file only once, the first time you generate the application's code.
|
Once you've defined the header, PhAB automatically includes it in any generated C or C++ stub file. So it's best to define the header when you first create the application. See "Startup Windows tab" in the Working with Applications chapter. You can modify the header whenever you need to. |
Here's a handy way of using this single header file to simultaneously define all your global variables and the extern references to those variables:
/* Header "globals.h" for my_appl Application */

#include <Pt.h>

#ifdef DEFINE_GLOBALS

#define GLOBAL
#define INIT(x) = x

#else

#define GLOBAL extern
#define INIT(x)

#endif

/* global variables */
GLOBAL int            variable1         INIT(1);
If DEFINE_GLOBALS is defined, then the last line in the above example looks like:
int variable1 = 1;
If DEFINE_GLOBALS isn't defined, then the last line in the above example looks like:
extern int variable1;
Remember to define all your application's global variables with the GLOBAL prefix, as shown above. Also make sure to include the following line in one (and only one) of your code files:
#define DEFINE_GLOBALS
Including this line ensures that the global variables are defined in this code file and used as extern declarations in all other code files.
|
In the Makefile, make the code files dependent on the header file. That way, if you make any changes to the header, all the code will be recompiled when you make your application. |
PhAB generates a function for every initialization function, module setup function, callback, function menu item, and so on you've specified in your application. If you don't need a function, leave its name blank.
After a function has been generated, you're free to modify it. There's just one condition: if you change the function's name, you must also change the name you specified in the link callback or internal link definition. Otherwise, PhAB will continue to regenerate the old name every time it generates the application.
The way you specify the function name in PhAB determines the name of the file the stub is put into:
|
PhAB recognizes .cc, .cpp, and .C as C++ extensions. |
If this file already exists, the stub function is added to it. You can use this technique to reduce the number of code files for your application. You can place any number of functions in the same file. We recommend you put all functions related to a module in the same file.
You can use C and C++ in the same PhAB application. See "What PhAB generates" in the Generating, Compiling, and Running Code chapter.
PhAB lets you define an application-level initialization function. The PhAB API calls this function once at startup, before any windows or other widgets are created. For information on setting up this function, see "Startup Windows tab" in the Working with Applications chapter.
The initialization function includes the standard argc and argv arguments so that your application can parse command-line options if needed (see below). You can also use this function to open any widget databases (see the Accessing PhAB Modules from Code chapter) or other application-specific data files.
Here's a sample initialization function generated by PhAB:
/* Y o u r   D e s c r i p t i o n                       */
/*                            AppBuilder Photon Code Lib */
/*                                         Version 2.01A */

/* Standard headers */
#include <stdio.h>
#include <stdlib.h>
#include <unistd.h>
#include <string.h>

/* Toolkit headers */
#include <Ph.h>
#include <Pt.h>
#include <Ap.h>

/* Local headers */
#include "abimport.h"
#include "proto.h"

/* Application Options string */
const char ApOptions[] =
    AB_OPTIONS ""; /* Add your options in the "" */


int
init( int argc, char *argv[] )

    {

    /* eliminate 'unreferenced' warnings */
    argc = argc, argv = argv;

    /* Handle command-line options - if required.
       Remember to ignore the ones handled by Photon. */

    /* Typical spot to open widget databases */

    /* Any other application-specific initialization */

    return( Pt_CONTINUE );

    }
PhAB applications have several command-line options by default:
| If server_name is: | This server is used: |
|---|---|
| node_number | //node_number/dev/photon |
| fullpath | fullpath |
| relative_path | /dev/relative_path |
You can suppress the options for the application's size and position--see "Command-line options" in the Working with Applications chapter. You can also define additional options.
|
Edit the application's usage message, which you'll find in the Usemsg file in your application's src directory, to include any additional options. For details about the usage message syntax, see usemsg in the QNX Neutrino Utilities Reference. |
Use the getopt() function (described in the C Library Reference) to process the command-line options. The following example shows how you could process several options (three of which take arguments):
const char ApOptions[] = AB_OPTIONS "a:b:c:pqr";

int init( int argc, char *argv[] ) {
    int opt;
    while ( ( opt = getopt( argc, argv, ApOptions ) ) != -1 )
        switch ( opt ) {
            case 'a' : ...
            case 'b' : ...
            ...
            case '?' : ...
            }
    ...
    return Pt_CONTINUE;
    }
AB_OPTIONS is a macro that defines the default options added by PhAB. It's generated by PhAB, based on your the settings from the Generate Options tab of the Project Properties dialog. For example, if you disable the Enable Window Position Arguments option, the AB_OPTIONS macro won't contain x: or y:. You can process the options in AB_OPTIONS in two ways:
or
The PhAB library also looks at the ApOptions array to take into account the options you've added. For example, for the above code the library recognizes that -px100 specifies the X position (along with -p), while -ax100 doesn't.
A module setup function is generated if you specify a function name in a module-type link callback, as described in "Module callback" in the Editing Resources and Callbacks in PhAB chapter.
All PhAB setup functions have three main arguments:
int
base_setup( PtWidget_t *link_instance,
            ApInfo_t *apinfo,
            PtCallbackInfo_t *cbinfo )

    {

    /* eliminate unreferenced warnings */
    link_instance = link_instance,
                    apinfo = apinfo,
                    cbinfo = cbinfo;

    /* your code here */

    return( Pt_CONTINUE );
    }
where:
You can also determine the widget that caused the setup function to be invoked by calling ApWidget().
Normally, a setup function returns the value Pt_CONTINUE. This tells the PhAB API to continue processing and to display the module being linked. For window and dialog modules, you can return Pt_END to terminate the link callback and destroy the module without displaying it. For window modules, you can return Pt_HALT to neither realize nor destroy the window. This is useful if you want to realize the window later.
A code-callback function is generated if you specify a code-type link callback, as described in "Code callbacks" in the Editing Resources and Callbacks in PhAB chapter.
All code-type callback functions have three main arguments:
int
mycallback( PtWidget_t *widget,
            ApInfo_t *apinfo,
            PtCallbackInfo_t *cbinfo )

    {

    /* eliminate unreferenced warnings */
    widget = widget,
    apinfo = apinfo,
    cbinfo = cbinfo;

    /* your code here */

    return( Pt_CONTINUE );
    }
where:
Your callback should return Pt_CONTINUE unless the description of the callback gives you a reason to return some thing else. ABR_CANCEL and ABR_DONE callbacks can return Pt_HALT to prevent the module from being closed.
Here are the data structures that you'll use a lot when specifying positions, sizes, and areas:
|
Photon maintains an internal pool of tiles because they're frequently used, and using a pool reduces the amount of time spent allocating and freeing the tiles. Use PhGetTile() to get a tile from the pool, and PhFreeTiles() to return a list of tiles to the pool. |
You probably won't use the PhTile_t structure unless you're using a PtRaw widget or creating a custom widget. For more information, see "PtRaw widget" in the Raw Drawing and Animation chapter, and Building Custom Widgets.
The Photon libraries provide various functions that work with these data types:
If you wish to schedule your own operations at particular time intervals, or if you just want to implement a time-out or trigger an event at a particular time, you may want to have a timer-based callback function. There are several ways to do this, with varying amounts of difficulty and accuracy:
The Photon libraries also include some low-level timer routines, but you need to be careful using them:
The easiest way to implement a timer is to use a PtTimer widget. It defines these resources:
For more information, see the Widget Reference.
|
When you create a PtTimer widget in PhAB, it appears as a black box. The box doesn't appear when you run the application; it's just a placeholder. |
PtTimer is easy to use, but doesn't give accurate timer events. In particular, it doesn't guarantee a constant repeat rate; since the repetition is handled by rearming the timer for each event, any delays in handling the events accumulate. Kernel timers guarantee an accurate repeat rate even if your application can't keep up with them.
The RtTimer* functions (described in the Photon Library Reference) give more accurate timing than PtTimer, but still not hard realtime. They're cover functions for the POSIX functions that manipulate the kernel timers:
These functions are more accurate than PtTimer because the timer is rearmed by the kernel, not by Photon. However, if Photon is busy handling events, there could still be delays in processing the expiration events.
You may want to do various things to a menu before it's displayed. You can use the menu's setup function to:
You can also use a function menu item to generate new items at runtime.
The methods for doing these things are discussed in the sections that follow.
If a menu item isn't currently a valid choice, it's a good idea to disable it so the user won't try to select it. Of course, you'll need to enable it when appropriate, too. If your menu has any toggle items, you'll also need to set them before the menu is displayed. To do these things, use the ApModifyItemState() function.
ApModifyItemState() takes a variable number of arguments:
For example, suppose our application has a menu module whose name is draw_menu, which includes items with the instance names draw_group and draw_align. We can disable these items with the following call:
ApModifyItemState (&draw_menu, AB_ITEM_DIM,
                   ABN_draw_group, ABN_draw_align, NULL);
You can use the ApModifyItemText() function to change the text for a menu item, for example, to replace a command by its opposite. The arguments are as follows:
For example, our Draw menu might have an item that's either Group or Split, depending on what objects the user chooses. We could change the text of the draw_group item in the draw_menu with the following code:
ApModifyItemText (&draw_menu, ABN_draw_group, "Split");
To get the current item text, call ApGetItemText().
If you change the item's text, you probably need to change the shortcut, too, by calling ApModifyItemAccel().
Sometimes you may need to generate the menu items at runtime. For example, PhAB's Window menu includes a list of the modules in your application. To generate menu items, add a function item to your menu module (as described in "Creating function items" of the Working with Modules chapter), and edit the stub function PhAB generates.
For example, if our draw_menu module includes a function item that calls add_shapes(), PhAB generates the following code:
int add_shapes (PtWidget_t *widget, ApInfo_t *apinfo,
                PtCallbackInfo_t *cbinfo)
{

    /* eliminate 'unreferenced' warnings */
    widget=widget, apinfo=apinfo, cbinfo=cbinfo;

    return (Pt_CONTINUE);
}
The parameters passed to this function are of no use.
We use the PtCreateWidget() function to create the menu items, which are usually PtMenuButton widgets. As discussed in the Manipulating Resources in Application Code chapter, we can use the same sort of argument list to set initial values for the resources as we use with PtSetResources(). For example, to add an item Rectangle with a keyboard shortcut of R:
PtArg_t    args[2];
PtWidget_t *new_item;

PtSetArg (&args[0], Pt_ARG_TEXT_STRING, "Rectangle", 0);
PtSetArg (&args[1], Pt_ARG_ACCEL_KEY, "R", 0);
new_item = PtCreateWidget( PtMenuButton, Pt_DEFAULT_PARENT,
                           2, args);
The second parameter in the call to PtCreateWidget() is the parent of the widget; when you're generating menu items, this should be set to Pt_DEFAULT_PARENT. This makes the new item a child of the current menu or submenu. Don't call PtSetParentWidget() in this case.
Next, we need a callback function for the new item. We have to create this manually; PhAB doesn't create a stub function for it. For example, the callback for our new item could be:
int rect_callback( PtWidget_t *widget,
                   void *client_data,
                   PtCallbackInfo_t *cbinfo )
{
    ...
}
This callback is similar to a code callback generated by PhAB. Its arguments are:
|
This is different from a PhAB code callback, which receives apinfo as its second argument. |
The last thing we need to do is add the callback to the menu item's Pt_CB_ACTIVATE callback list, using the PtAddCallback() function:
PtAddCallback (new_item, Pt_CB_ACTIVATE,
               rect_callback, NULL);
The last argument to PtAddCallback() specifies what's to be passed as the client_data argument of the callback. For more information, see "Callbacks" in the Managing Widgets in Application Code chapter.
Let's put all this together:
int rect_callback( PtWidget_t *widget,
                   void *client_data,
                   PtCallbackInfo_t *cbinfo)
{
    ...
}

int
add_shapes (PtWidget_t *widget, ApInfo_t *apinfo,
            PtCallbackInfo_t *cbinfo)
{
    PtArg_t    args[2];
    PtWidget_t *new_item;

    /* eliminate 'unreferenced' warnings */
    widget=widget, apinfo-apinfo, cbinfo=cbinfo;

    PtSetArg (&args[0], Pt_ARG_TEXT_STRING,
              "Rectangle", 0);
    PtSetArg (&args[1], Pt_ARG_ACCEL_KEY, "R", 0);
    new_item = PtCreateWidget( PtMenuButton, Pt_DEFAULT_PARENT,
                               2, args);
    PtAddCallback (new_item, Pt_CB_ACTIVATE,
                   rect_callback, NULL);

    /* Repeat the above for other shapes... */

    return (Pt_CONTINUE);
}
You can create submenus in the menu created for a menu function item as follows:
menu = PtGetParentWidget ();
|
PtMenu is a container, so this new menu becomes the current default parent. |
PtSetParentWidget( menu );
This example shows how to generate a submenu, as well as one way the client_data can be used in a generic callback to identify the item chosen from the menu:
/* A menu with a submenu                                 */

/* Standard headers */
#include <stdio.h>
#include <stdlib.h>
#include <unistd.h>
#include <string.h>

/* Toolkit headers */
#include <Ph.h>
#include <Pt.h>
#include <Ap.h>

/* Local headers */
#include "abimport.h"
#include "proto.h"

/* Constants for the shapes in the menu */
#define RECTANGLE  1
#define CIRCLE     2
#define DOT        3
#define BLOB       4
#define POLYGON    5

int
ShapeMenuCB( PtWidget_t *widget, void *client_data,
             PtCallbackInfo_t *cbinfo )
{
  int shape_chosen = (int) client_data;

  widget=widget, client_data=client_data, cbinfo=cbinfo;

  /* This callback uses the client data to determine
     which shape was chosen. */

  switch (shape_chosen) {

    case RECTANGLE: ...
                    break;
    case CIRCLE   : ...
                    break;
    case DOT      : ...
                    break;
    case BLOB     : ...
                    break;
    case POLYGON  : ...
                    break;
    default       : printf ("Unknown shape: %d\n",
                            shape_chosen);
  }

  return (Pt_CONTINUE);
}

int
add_shapes( PtWidget_t *widget, ApInfo_t *apinfo,
            PtCallbackInfo_t *cbinfo )
{
  PtArg_t args[3];
  PtWidget_t *menu, *new_item;

  /* eliminate 'unreferenced' warnings */
  widget = widget, apinfo = apinfo, cbinfo = cbinfo;

  PtSetArg (&args[0], Pt_ARG_TEXT_STRING, "Rectangle", 0);
  PtSetArg (&args[1], Pt_ARG_ACCEL_KEY, "R", 0);
  new_item = PtCreateWidget( PtMenuButton, Pt_DEFAULT_PARENT,
                             2, args);
  PtAddCallback ( new_item, Pt_CB_ACTIVATE, ShapeMenuCB,
                  (void *)RECTANGLE );

  PtSetArg (&args[0], Pt_ARG_TEXT_STRING, "Circle", 0);
  PtSetArg (&args[1], Pt_ARG_ACCEL_KEY, "C", 0);
  new_item = PtCreateWidget( PtMenuButton, Pt_DEFAULT_PARENT,
                             2, args);
  PtAddCallback ( new_item, Pt_CB_ACTIVATE, ShapeMenuCB,
                  (void *)CIRCLE );

  /* Create a menu button for the submenu. */

  PtSetArg (&args[0], Pt_ARG_TEXT_STRING, "Miscellaneous", 0);
  PtSetArg (&args[1], Pt_ARG_ACCEL_KEY, "M", 0);
  PtSetArg (&args[2], Pt_ARG_BUTTON_TYPE, Pt_MENU_RIGHT, 0 );
  new_item = PtCreateWidget( PtMenuButton, Pt_DEFAULT_PARENT,
                             3, args);

  /* Save the current default parent. */

  menu = PtGetParentWidget();

  /* Create a submenu. It becomes the new default parent. */

  PtSetArg (&args[0], Pt_ARG_MENU_FLAGS,
      Pt_MENU_CHILD, Pt_MENU_CHILD);
  new_item = PtCreateWidget( PtMenu, Pt_DEFAULT_PARENT, 1, args);

  /* Add items to the submenu. */

  PtSetArg (&args[0], Pt_ARG_TEXT_STRING, "Dot", 0);
  PtSetArg (&args[1], Pt_ARG_ACCEL_KEY, "D", 0);
  new_item = PtCreateWidget( PtMenuButton, Pt_DEFAULT_PARENT,
                             2, args);
  PtAddCallback ( new_item, Pt_CB_ACTIVATE, ShapeMenuCB,
                  (void *)DOT );

  PtSetArg (&args[0], Pt_ARG_TEXT_STRING, "Blob", 0);
  PtSetArg (&args[1], Pt_ARG_ACCEL_KEY, "B", 0);
  new_item = PtCreateWidget( PtMenuButton, Pt_DEFAULT_PARENT,
                             2, args);
  PtAddCallback ( new_item, Pt_CB_ACTIVATE, ShapeMenuCB,
                  (void *)BLOB);

  /* Restore the current default parent. */

  PtSetParentWidget (menu);

  /* Continue adding items to the top menu. */

  PtSetArg (&args[0], Pt_ARG_TEXT_STRING, "Polygon", 0);
  PtSetArg (&args[1], Pt_ARG_ACCEL_KEY, "P", 0);
  new_item = PtCreateWidget( PtMenuButton, Pt_DEFAULT_PARENT,
                             2, args);
  PtAddCallback ( new_item, Pt_CB_ACTIVATE, ShapeMenuCB,
                  (void *)POLYGON);

  return( Pt_CONTINUE );
}
If your application is making changes to a lot of widgets at once, you might want to delay updating the display until you're finished making the changes. Doing this can reduce flickering, and, in some cases, improve your application's performance.
You can delay updating:
The Photon libraries use a hold count to let you delay updating the display for your entire application:
For more information about these functions, see the Photon Library Reference.
The Photon libraries use flux counts to let you delay updating the display for a specific container. When the flux count is nonzero, and you modify the container or its children, the widgets aren't marked as damaged. What happens when the flux count returns to zero depends on which functions you use:
PtContainerHold() and PtContainerRelease() are easier to use, because you don't need to determine which widgets or areas you need to damage. However, there might be more flickering than if you use PtStartFlux() and PtEndFlux().
If you need to determine if a container or any of its parents is currently in flux, call PtIsFluxing().
For more information about these functions, see the Photon Library Reference.
You can call PtFlush() at any time to immediately update the damaged areas of the display. PtFlush() ignores the hold count and doesn't change it.
If a container is in flux, and you modify it or its children, the Photon libraries don't mark the widgets as damaged, so PtFlush() doesn't repair them.
|
Combining holds on the whole application, holds on containers, and calls to PtFlush() can give you unexpected results. For example, if you hold the entire application, damage part of a container, hold the container, modify it, and then call PtFlush(), the libraries repair the damage -- displaying whatever portion of the modifications that affect the damaged area. |
|
|
|
|